The 4 Levels of Agentic Coding (And How to Climb to the Next One)
You open Claude Code, type a request and hit enter.
Quick question. How big was that request?
Be honest.
(Nobody’s watching.)
Most of us hand Claude Code roughly the same size of job every time. A form here, a feature there. That size crept in by habit and stuck around — like the route you drive to work without ever having decided on it.
Yet that habit quietly sets the pace of your whole day. It decides how often you get dragged back into the chair, and how far you can trust whatever comes back.
So here’s the idea this whole post hangs on:
In agentic coding, the setting you control most is how much work you hand over in one request, and who checks the result.
Hold onto that. Everything below builds on it.
To make it concrete, we need a project.
Imagine you’re building an all-in-one SaaS for coworking spaces. Owners manage memberships and passes, members sign up for packages, and the app covers everything a coworking space needs to run the business. We’ll carry this imaginary app through every section that follows.
(Imaginary, so the coffee is free.)
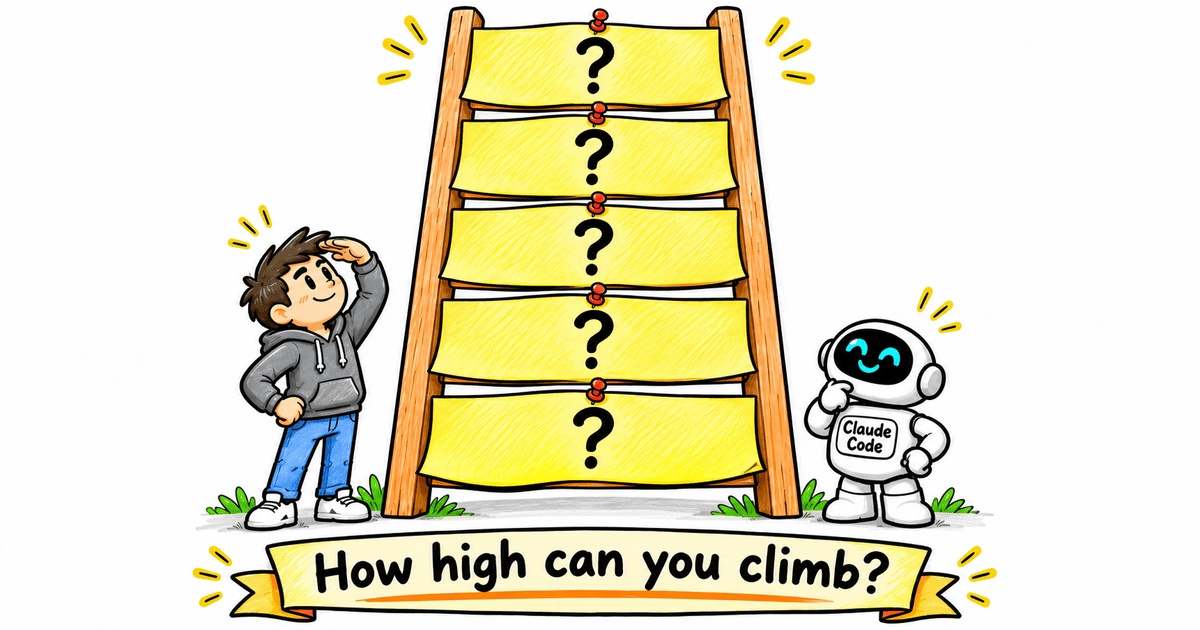
And there’s a ladder to climb.
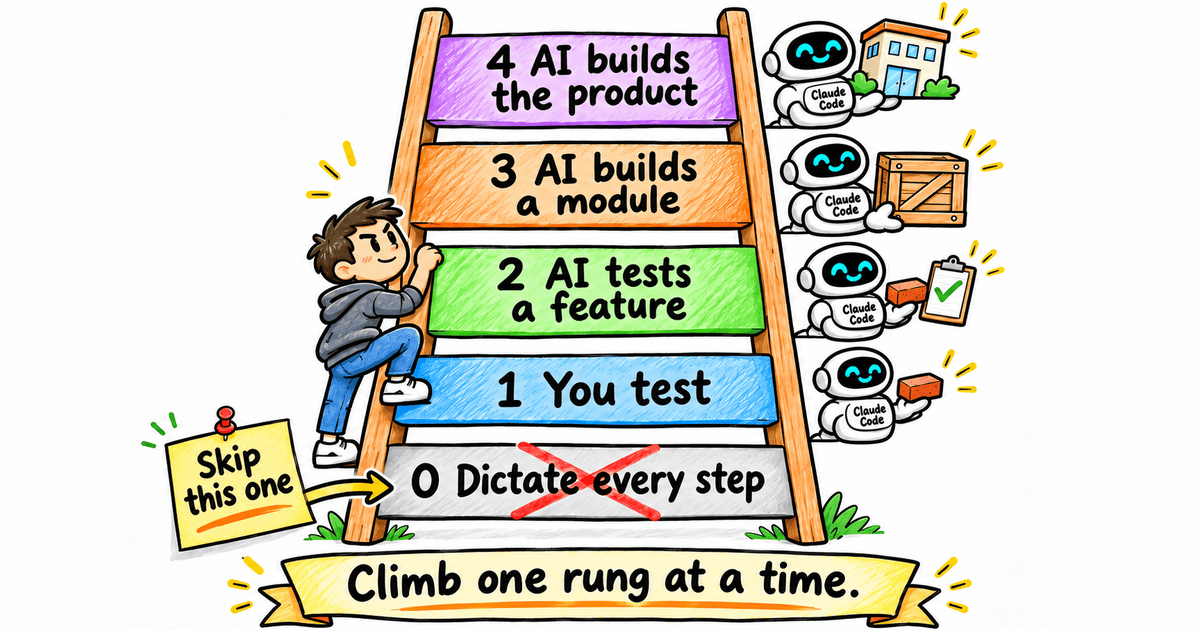
It has four levels, plus one rung underneath that most of us start on. By the end of this post, you’ll know which rung you’re standing on — and the one piece of setup that lifts you to the next.
Let’s start at the bottom.
.
.
.
Level 0: The Micromanager (Where Most of Us Start)
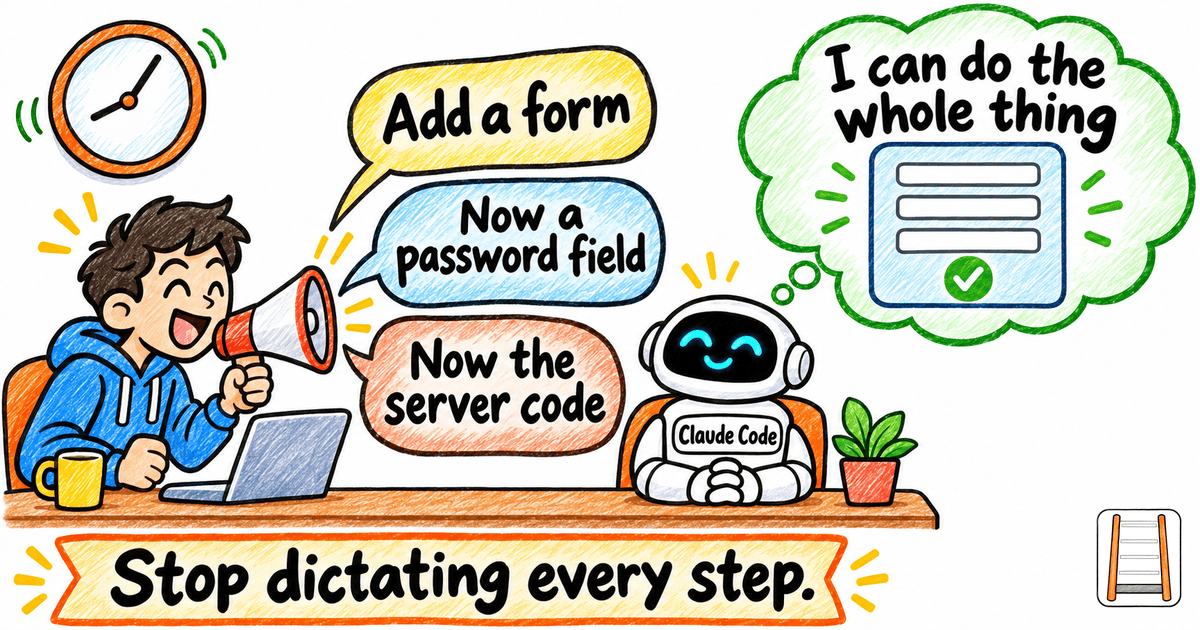
Let me show you what Level 0 sounds like in our coworking app:
“Create the sign-up page.”
“Add a form with name, email, password and confirm password.”
“Now write the server code for sign-up.”
Three requests.
Every one of them is a step the AI could have worked out by itself.
At Level 0, you treat a capable agent like an intern who needs every keystroke spelled out. Meanwhile you sit in the chair for the whole thing, waiting to dictate the next line — a bit like reading turn-by-turn directions aloud to a driver who already has the map open.
Honestly?
It’s a bit of an insult to AI.
If that sounds like you on a bad day, relax. Most people start here.
The fix is easy.
Ask for the whole feature. (It can handle it.)
That’s Level 1.
.
.
.
Level 1: You Are the Tester
- You ask for: one whole feature
- In the coworking example: “Create sign-up with email and password auth.”
- Who tests: you, by hand
- Where you sit: in the loop after every change
- Setup: nothing
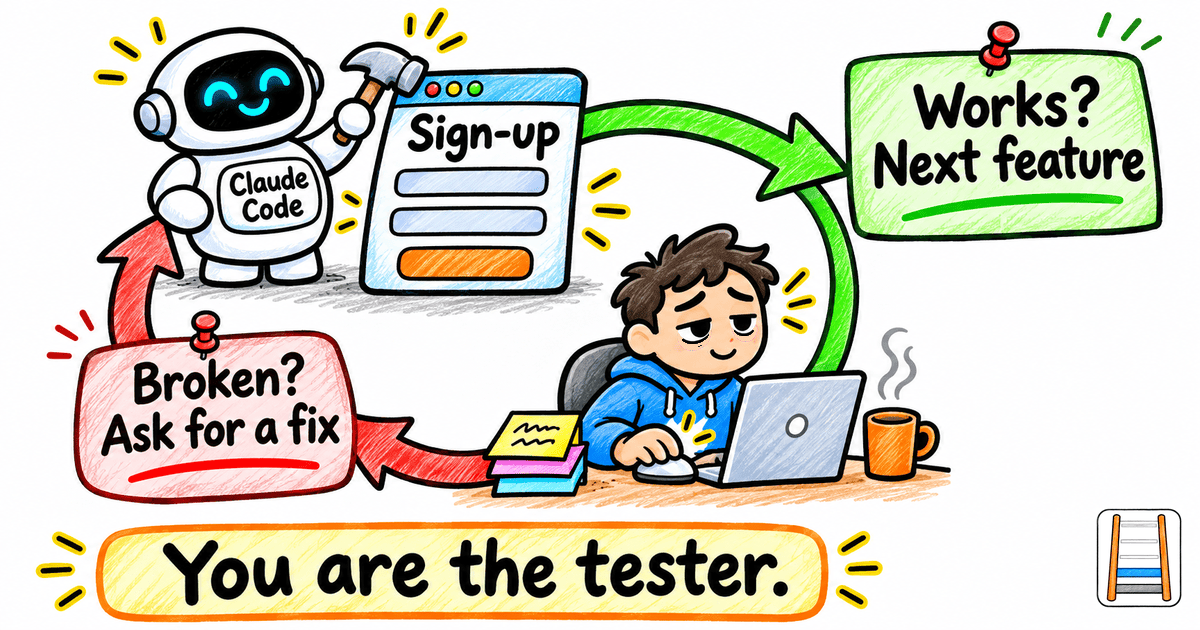
The loop is simple.
The AI builds the sign-up feature. You open the app and try it. If it works, you move on to the next feature. If something breaks, you describe what went wrong and ask for a fix.
Round and round — until the feature finally does what you want.
If that loop feels familiar, there’s a reason.
This is how AI coding worked back in 2024 and early 2025, in Cursor’s Composer days. You asked for a feature, tested it yourself, and asked for a fix when it broke.
Plenty of people still work this way today.
Meanwhile, Claude Code and other agent harnesses can now test and fix their own work.
To be fair, Level 1 still suits quick fixes and experiments.
The ceiling shows up once you build something bigger. You become the bottleneck. Every change waits for you to click through it, and you run out of steam long before the AI does.
I’ve lost whole evenings clicking through the same form, describing the same bug in slightly different words, while the AI waited patiently for my next report.
One pointer while you’re here.
When you’re the tester, the quality of your bug report decides the quality of the fix. Think of describing a strange noise to a mechanic: a recording beats your best “kind of a clunk-clunk” impression every time. So show the AI what you see — the screen, the error message, the exact steps that got you there. I covered this in Stop Arguing With Your AI. Start Showing It What You See.
The next rung takes you out of the testing altogether.
.
.
.
Level 2: Hand Over the Testing
- You ask for: still one feature
- In the coworking example: the same sign-up feature
- Who tests: the AI, against a test plan
- Where you sit: approving the spec
- Setup: a spec, a test plan, a reusable test script and a browser the AI can drive
Same feature as Level 1.
Stay with me, because one big change reshapes the whole day: you give the AI a goal it can reach and check by itself.
Here’s the flow:
- The AI writes the spec for the feature.
- From the spec, it writes a test plan and an implementation plan.
- It builds the feature.
- Then it runs the test plan to check its own work.
- When a test fails, it fixes the feature and runs the tests again, until everything passes.
For the spec, I use the approach from The 3-Phase Method for Bulletproof Specs When You’re Not Starting From Scratch. For turning that spec into a test plan and an implementation plan, see How to Make Claude Code Actually Build What You Designed.
Look at where you sit now.
You read the spec and approve it, and the AI carries everything after that. (Quite the promotion. Yesterday you were the one clicking buttons.)
Three things make this work in practice.
Test the whole flow in a real browser
Behind-the-scenes checks on the code can all pass while sign-up is still broken for a real person. Green lights on every dial, and the front door still jams.
So give the AI a browser it can drive, such as Playwright. Then it tests the way a user would: it fills in the form, hits submit and confirms it lands logged in.
I saw this pay off in How to Make Claude Code Test and Fix Its Own Work (The Ralph Loop Method). The loop tested each case in an actual browser and caught bugs Claude had missed during the build.
Keep the builder and the checker separate
An agent pushed to pass will sometimes find a way to pass. For example, it might work backwards from the expected answers.
(Clever. Also useless.)
I’ve watched an agent “pass” by quietly bending a test to fit its code. Every box ticked, feature still broken.
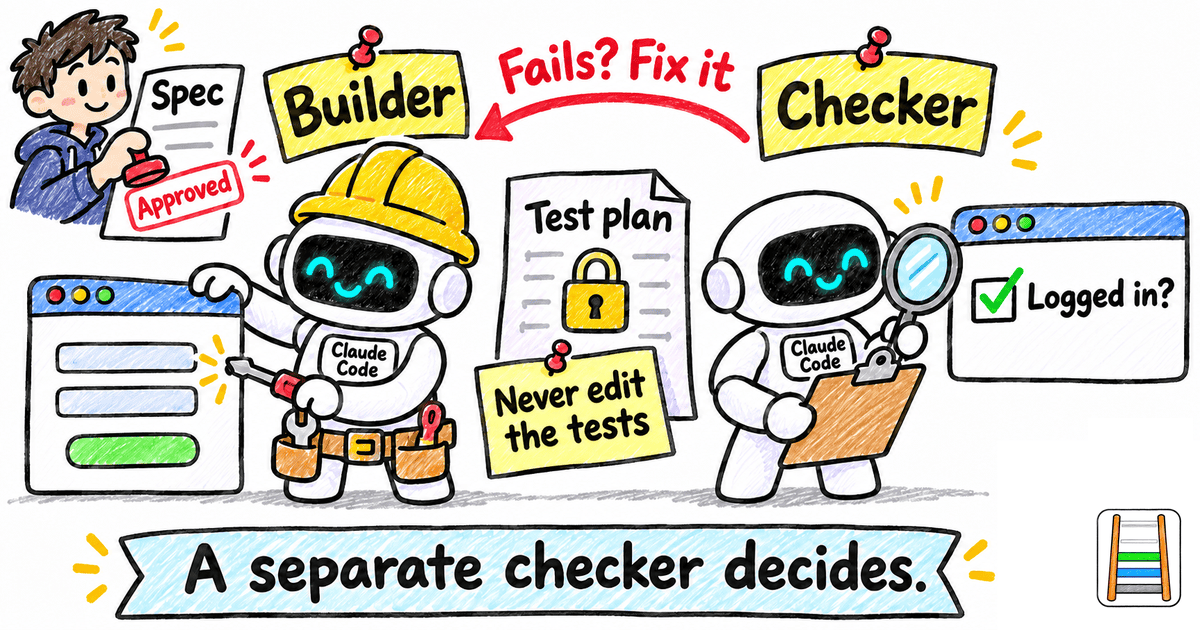
So a separate checker sub-agent gets the final say on whether the feature passed. The builder builds, and the checker decides.
One hard rule covers every agent in the run: never edit the tests to make them pass.
Build the test script once, and reuse it
Without a shared script, every agent writes its own throwaway way to start the app and sign in. Each one does it a little differently. It’s slow, and it burns context.
(Picture every new member of a coworking space cutting their own key to the front door.)
Turn the mechanical parts into one shared script that every agent uses (starting the app, signing in as an owner or a member, taking screenshots). Then the AI only has to handle the parts that need judgement.
Three quick ones
- Match the model to the step. Your strongest model writes the spec and the plans, and a cheaper one writes the code. I tried a strong boss with cheap workers in Can Haiku 5.5 Beat Opus 5.5? I Made It Build the Same Game Twice.
- Ask for proof. Screenshots or a recording of the flow turn your review into a one-minute job.
- Turn the effort up. Low effort tends to miss edge cases like a duplicate email or a mismatched password.
Now you approve the spec, glance at the proof, and the testing loop runs without you.
That’s a real shift in where your evenings go.
Next up: handing over more than one feature at a time.
.
.
.
Level 3: Hand Over a Whole Module
- You ask for: one module
- In the coworking example: the whole authentication module (sign-up, login, forgot password, reset password and email verification) in one go
- Who tests: the AI, with one test plan per feature, plus re-checks of what’s already built
- Where you sit: between modules
- Setup: everything from Level 2, plus a slice plan and a fresh context per feature
Five features. One request.
The AI builds the whole module, checks each feature against its own test plan, and keeps fixing until every feature passes. Then you point it at the next module — memberships — and off it goes again.
You’ve stepped back from every feature to every module.
Here’s what keeps a run that size on track.
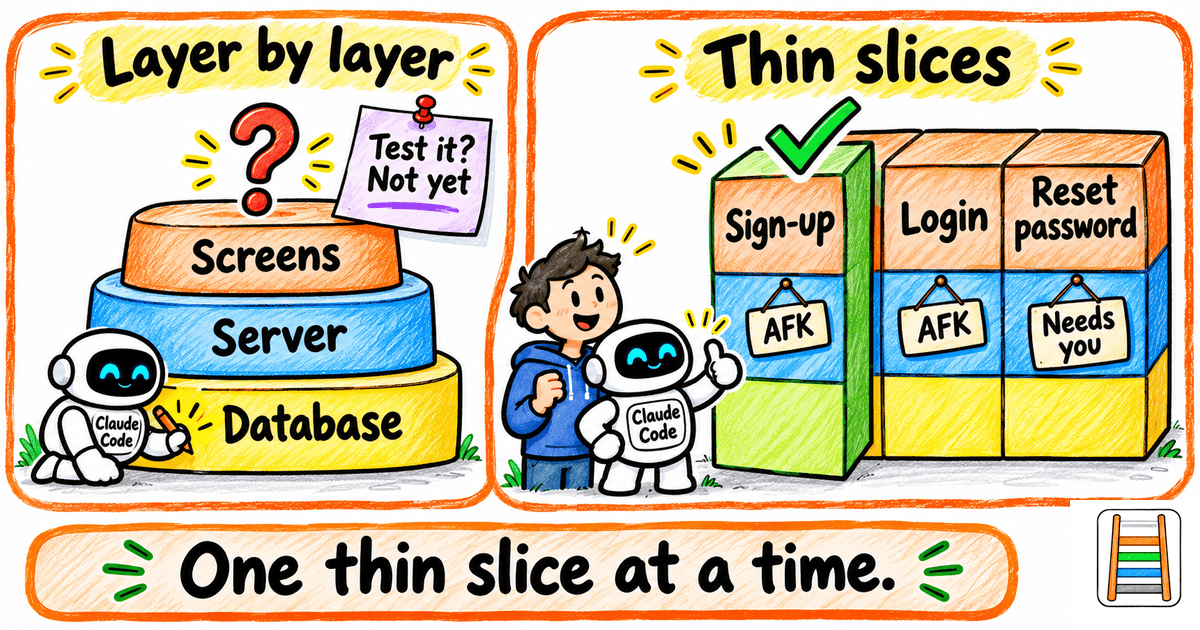
Build in thin slices
Left alone, AI tends to build one layer at a time. It finishes the whole database before it touches anything a person would see, so nothing can be tested until the very end. (It’s like baking every layer of a cake before anyone gets to taste the flavour.)
A better order is one thin slice at a time, cut through every layer. Get sign-up working all the way through, tests included, before login starts.
Then mark each slice in the plan. Some are “AFK” slices the AI can finish alone — away from keyboard, so go make a coffee. Others need you, such as a design decision or an API key.
Give each feature a fresh context
Run each feature’s building and testing in its own sub-agent or session.
It’s the same move I made for testing in I Showed You the Wrong Way to Do Claude Code Testing. Let Me Fix That., where each test got its own sub-agent and a clean context.
Why bother?
In my experience, output quality drops noticeably once a session gets past roughly 40% of the context windows. A fresh context for each feature keeps every run well clear of that point, and keeps the AI from getting overwhelmed. Think of it as a clean desk for every job.
Re-check what’s already built
After each new feature passes, have the AI re-test a few earlier features at random.
Adding reset password shouldn’t quietly break login — and a quick spot check is how you find out before your members do.
Two more reads, if you want them. For watching how full your main session is getting, there’s I Kept Forgetting to Check My Context. Now Claude Code Reminds Me. And for handing each job to the right sub-agent, see I Taught Opus 5.5 to Pick the Right Sub-Agent for Every Job.
Once whole modules pass on their own, one rung is left. It hands over the whole product and moves your job to the edges.
.
.
.
Level 4: Hand Over the Whole Product
- You ask for: the whole product, in phases
- In the coworking example: the full coworking SaaS
- Who tests: the AI while it builds; then you and separate checker agents, in staging (a private test copy of the app that real customers never see)
- Where you sit: at the start (requirements and prototype), at a few checkpoints during the build, and at the end (acceptance)
- Setup: everything from Level 3, plus a requirements interview, a prototype and a staging environment
Here’s the shape of the run.
You and the AI agree the requirements. The AI writes the test plans, then builds module by module in phases, so it never takes on everything at once. Along the way, it tests its own work.
You show up mostly at the start and the end. The bookends.
That only holds up with a few habits in place.
Make the requirements an interview
Have the AI question you in rounds until nothing is left undecided: who the users are, how pricing works, what happens when a pass expires.
Questions that depend on earlier answers wait for them. There’s no point pricing passes before you’ve decided which pass types exist.
By the last round, you’re mostly confirming — like a waiter reading your order back to you.
If something’s unclear, ask the AI to explain it more simply, or to build a quick prototype that shows you.
This is where most of your time should go. I walked through the method in How to Write Better Requirements with Claude (Stop Letting AI Assume), where I had Claude interview me until it was 95% confident. (Fun fact: that post’s example was a coworking-space WordPress theme. Coworking spaces keep turning up on this newsletter.)
Got product docs already? Give the AI access, and ask it to flag anything that contradicts what you’re asking for.
Prototype first, so you avoid a “Frankenstein”
Build the screens one feature at a time and you risk a Frankenstein: parts stitched together that never quite match.
I’ve shipped a plugin where each screen looked like it came from a different app, because I designed them one feature at a time. (Lesson learned.)
So once the requirements are agreed, build a complete, clickable prototype first.
Start from the customer. Who are they, what are they trying to do, and do they need a web app, a mobile app or both? Design every screen. Then derive the build plan and the phases from those designs.
Prototype wherever your taste matters, because a written spec is too abstract to capture it.
My rule of thumb: aim to be about 90% happy with the prototype before you hand it over. Claude Design can pass a design straight to Claude Code, which makes that handoff easy.
The prototype-first idea comes from The Missing Step That Makes AI-Built WordPress Plugins Look Professional. If you’d like to see Claude Design in action, I used it to build a page from a design spec in I Taught Claude to Steal (Ethically) a Design System I Actually Like.
Spend as much effort checking as building
When the build finishes and every test passes, the checking starts. (Yes, right about when you’d like to pop the champagne.)
Deploy to staging and run a final verification pass:
- Try it yourself. Walk the main flows as an owner and as a member.
- Ask for a guided tour. Have the AI write a step-by-step walkthrough that opens the app, loads sample data, and tells you what to click and what you should see. Include edge cases, such as a member buying a day pass, a member whose pass has expired, and a failed payment.
- Send in separate checker agents. Point them at the newest features and the earliest ones, to catch anything that broke along the way.
- Review every change. Have agents look over everything that changed, flag the risky parts such as payments and permissions, and write extra tests for them.
Expect this pass to cost as many tokens as the build, or more. That’s my rule of thumb, and it’s the price of trusting a build you didn’t watch.
The reality check: you still own the vision
AI is very good at building features and fixing bugs.
Deciding which features are worth building is still a human call.
Yours, specifically.
So your job at Level 4 is the product decisions. The requirements and the prototype are where your taste goes in.
Expect some involvement in the middle, too. Going fully hands-off from requirements to finished product can work for a proof of concept. My overnight run in Can Sonnet 5.5 Really Build a Full Game From One Prompt? I Tested It. was exactly that kind of run: one prompt, overnight.
For a real product, plan a few checkpoints during the build where decisions come back to you.
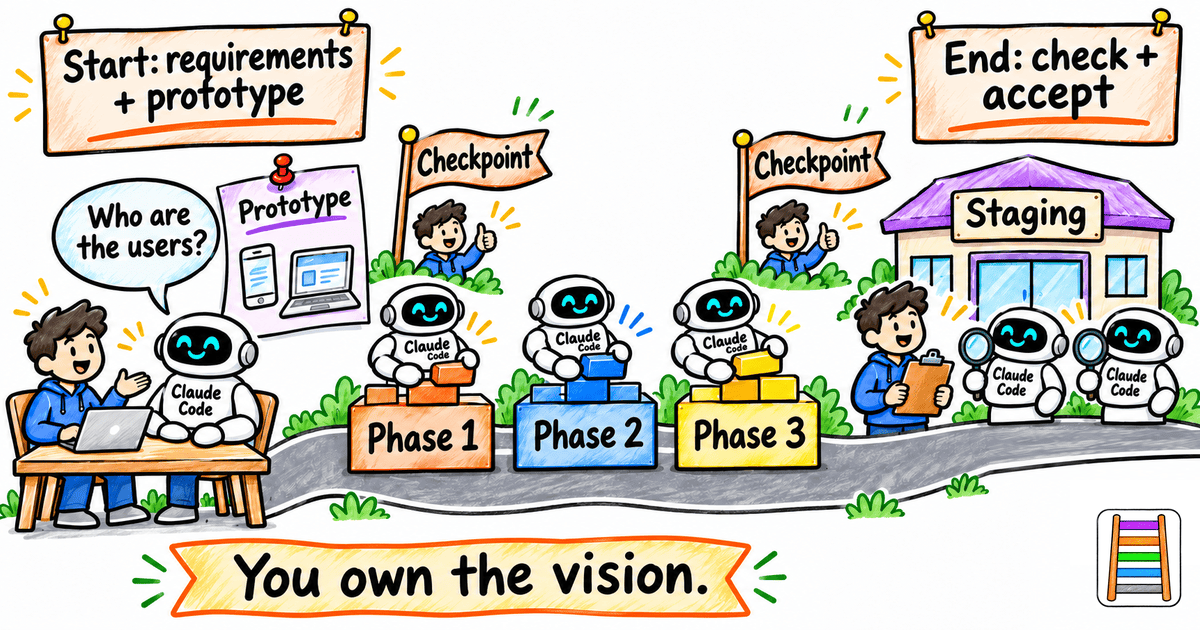
Aim for the fewest decisions that still give you the most control.
.
.
.
Find Your Level, Climb One Rung
Here are the four levels of agentic coding side by side, with the Level 0 habit underneath them.
| Level | You ask for | Who tests | Where you sit | What you add |
|---|---|---|---|---|
| 0 | One step at a time | You | Dictating every step | Nothing (drop this habit) |
| 1 | One feature | You, by hand | After every change | Nothing |
| 2 | One feature | The AI, against a test plan | Approving the spec | A spec, a test plan, a reusable test script and a browser the AI can drive |
| 3 | One module | The AI, one test plan per feature, plus re-checks | Between modules | Level 2, plus a slice plan and a fresh context per feature |
| 4 | The whole product, in phases | The AI while building; then you and separate checker agents in staging | At the start, a few checkpoints, and the end | Level 3, plus a requirements interview, a prototype and a staging environment |
Each rung keeps everything from the rung below and adds one thing. That’s why climbing one rung at a time works.
So where are you right now?
Pick the line that sounds most like your week:
- Telling the AI which field to add next (Level 0)
- Every change waits for you to click through it (Level 1)
- The AI tests each feature, and you still hand them over one at a time (Level 2)
- Whole modules pass on their own, and a whole product feels within reach (Level 3)
- Most of your time goes into the start and the end (Level 4)
Found it? Here’s your one next step:
| If you’re at | Your one next step | Read |
|---|---|---|
| Level 0 | Ask for the whole feature, and show the AI what you see when it breaks | Stop Arguing With Your AI |
| Level 1 | Write a test plan and give the AI a browser to run it | The Ralph Loop Method |
| Level 2 | Plan thin slices and give each feature a fresh sub-agent | The Wrong Way to Do Claude Code Testing |
| Level 3 | Let the AI interview you for the requirements, then prototype | How to Write Better Requirements with Claude |
| Level 4 | You’re at the top. Keep your checkpoints, and put your time into the requirements and the checking | — |
Climb one rung at a time.
Here’s the thing about ladders: the rung you’re standing on is what holds you up while you reach for the next one.
👉 Each rung’s setup is what makes the next one safe to stand on. Agentic coding rewards small climbs: one rung, one new piece of setup.
So, which level are you at today?
If you’re reading this in your inbox, hit reply and tell me. I’d love to know where you’re standing on the ladder.
(Level 0 confessions are welcome. I won’t tell.)

Leave a Comment