How I “Vibe Code” a WordPress Plugin in 50 Minutes with Claude Code
A few months ago, I presented a talk called “Build Your First WordPress Plugin with The Power of AI (Even if You Can’t Code!)” at WordCamp Johor Bharu 2025.
The room was divided.
The tech folks? Their eyes lit up like Christmas trees.
Everyone else? They looked like I’d just explained quantum physics in ancient Sanskrit.
That’s when it hit me – I was too deep in the rabbit hole to see how overwhelming my “simple” workflow actually was.
.
.
.
The Original Sin: Over-Complication
My original workflow was a beast:
- Brainstorm requirements (using one AI tool)
- Establish project rules (using another tool)
- Generate technical specifications (yet another tool)
- Create implementation plans (you guessed it – another tool)
- Implement step-by-step (finally, some coding with Cursor)
Five steps. Multiple AI tools. Different subscriptions.
No wonder people looked confused.
.
.
.
Back to the Drawing Board
I needed to simplify. Drastically.
First decision: One tool to rule them all. I chose Claude Code.
Why? Claude 4 Opus isn’t just powerful – it’s the Swiss Army knife of AI coding. It can plan, research, code, and debug all in one place.
Second decision: Streamline the workflow.
Now, I still believe in proper requirements and project rules (I’ve written about how to brainstorm for proper project requirements and establishing project rules before). But here’s the key insight:
Project rules (WordPress standards) you create once and reuse. Requirements are unique per plugin, but quick to define with the right template.
So the actual development workflow becomes just three steps:
- Wireframe – ASCII sketches to visualize without code
- Build – Let Claude Code do its magic
- Improve – Fix what needs fixing
That’s it.
.
.
.
Setting Up Your Project Structure
Before diving in, create this simple structure:
your-plugin/
├── notes/
│   ├── requirements.md    # Your plugin-specific requirements
│   ├── rules.md          # WordPress development standards
│   └── wireframes.md     # ASCII wireframes (created in step 1)
└── ... (plugin files will go here)
This organization keeps your planning separate from your code, making it easy for Claude Code to reference.
Pro tip: The eza command in my prompts is a modern replacement for ls. If you don’t have it, just use ls -la or tree – the point is to show Claude Code your project structure.
.
.
.
The Plugin That Started It All: Secure AI Agent Access
To test this streamlined approach, I built something I actually needed – a WordPress plugin that gives AI agents secure, temporary access to WordPress admin.
Here’s how the 3-step process played out:
Step 1: Wireframe (5 minutes)
This is where ASCII art becomes your best friend.
Here’s the exact prompt I use:
# Step 1: Run the following command to understand the current state of the project:
eza . --tree -git-ignore --ignore-glob="node_modules|.git|tmp|.claude|dist|.next|notes"

# Step 2: Review the project requirements and rules:
- @notes/rules.md
- @notes/requirements.md

# Step 3: Design the ASCII wireframe for the project:
1. Explore the codebase, understand the requirements and project rules, and think harder about the best way to design the ASCII wireframe for the project.
2. Come up with a list of todos to design the ASCII wireframe for the project.
3. Assign a new sub agent to work on each item in the todos list.
4. Once the sub agent is done, review the work and make sure it meets the requirements and project rules.
5. If it does, add it to the @notes/wireframes.md file.
6. If it doesn't, ask the sub agent to fix it.
7. Repeat the process until the wireframe is complete.
8. Once the wireframe is complete, add it to the @notes/wireframes.md file.
The magic here?
Claude Code uses sub-agents to think through each UI component separately, then assembles them into a cohesive design.
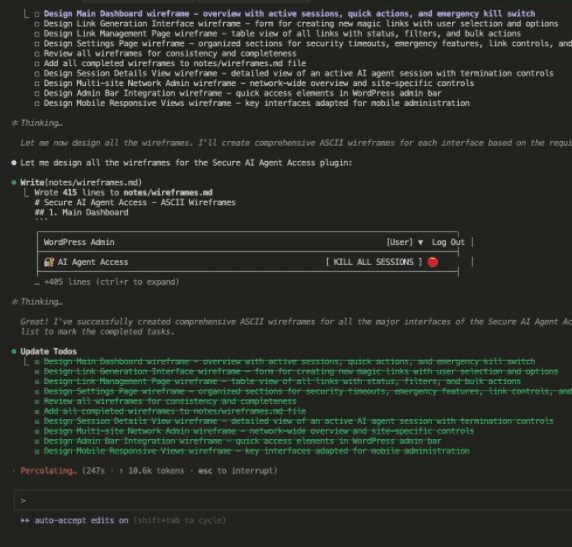
Example of the result:
┌─── Generate Magic Link ───────────────────────────────────────┐
│                                                               │
│  Select User Account                                          │
│  ┌─────────────────────────────────────────────────────────┐  │
│  │ [�] Select a user...                                    │  │
│  └─────────────────────────────────────────────────────────┘  │
│                                                               │
│  User List:                                                   │
│  ┌─────────────────────────────────────────────────────────┐  │
│  │ " content_editor (Editor)                               │  │
│  │ " shop_manager (Shop Manager)                           │  │
│  │ " author_user (Author)                                  │  │
│  │ " contributor_1 (Contributor)                           │  │
│  │                                                         │  │
│  │ �� Administrator accounts cannot be selected            │  │
│  └─────────────────────────────────────────────────────────┘  │
│                                                               │
│  Session Duration                                             │
│  ┌─────────────────────────────────────────────────────────┐  │
│  │ Maximum: 1 hour (default)                               │  │
│  │ Inactivity timeout: 15 minutes                          │  │
│  │ Link expires if unused: 24 hours                        │  │
│  └─────────────────────────────────────────────────────────┘  │
│                                                               │
│  [ Generate Magic Link ]                                      │
│                                                               │
└───────────────────────────────────────────────────────────────┘
Why ASCII? Three reasons:
- Saves tokens – Less input means clearer thinking from Claude
- Reduces hallucinations – Simple text can’t confuse the AI
- Easy to modify – Want to change the layout? Just move some characters
Claude Code immediately understood the interface design without a single line of HTML.
.
.
.
Step 2: Build (30 minutes)
Here’s where my preparation paid off. I use this exact prompt:
# Step 1: Run the following command to understand the current state of the project:
eza . --tree -git-ignore --ignore-glob="node_modules|.git|tmp|.claude|dist|notes"

# Step 2: Review the project requirements and rules:
- @notes/rules.md
- @notes/requirements.md
- @notes/wireframes.md

# Step 3: Build the project:
Think hard, explore the codebase, understand the requirements and project rules, and then build the project step by step.

Use web search to find solutions to problems you encounter.

Use sub-agents if you need to delegate tasks.

IMPORTANT: ONLY ONE SUB AGENT SHOULD BE RUNNING AT A TIME.
Notice the key instructions:
- “Think hard” – This triggers Claude’s deep thinking mode
- “Explore the codebase” – Forces it to understand what already exists
- “Build step by step” – Prevents rushing nd ensures thoroughness
- “Use web search” – Keeps it current with latest WordPress standards
Claude Code then:
- Researched current WordPress best practices
- Created the proper plugin structure
- Implemented database tables for magic links
- Added security features (nonces, sanitization, escaping)
- Built the admin interface matching our wireframes
- Created the activator and deactivator classes
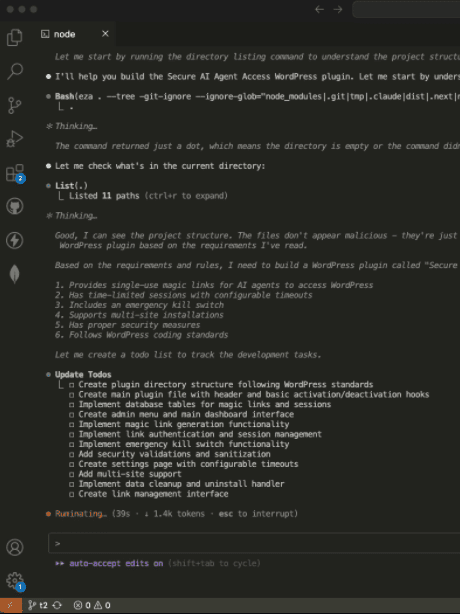
All automatically.
All following the rules I’d established.
The key?
Having those WordPress development rules ready meant Claude Code knew exactly what standards to follow.
No guesswork.
No “I think this is how WordPress does it.”
And with clear, plugin-specific requirements, it knew exactly what to build.
.
.
.
Join The Art of Vibe Coding—short, practical emails on shipping with AI (without the chaos).
No spam. Unsubscribe anytime. Seriously.
Want techniques like these weekly?
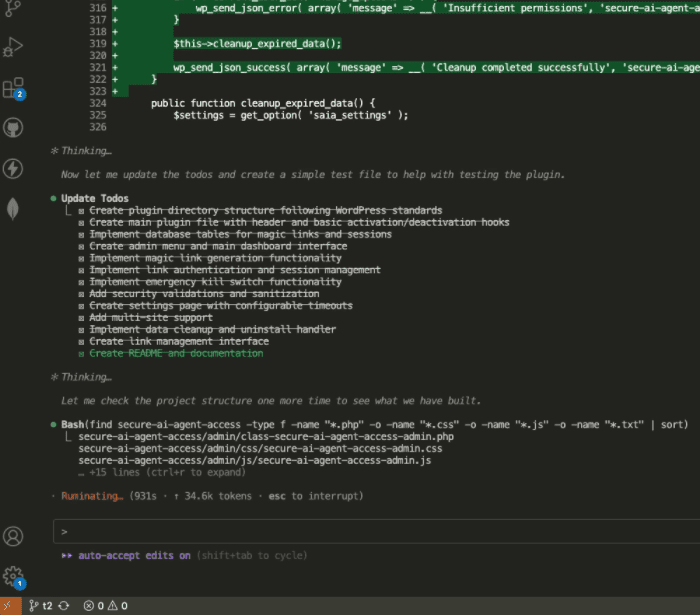
Step 3: Improve (15 minutes)
Once the initial build was complete, we entered the refinement phase. Here’s my improvement prompt:
# Step 1: Run the following command to understand the current state of the project:
eza . --tree -git-ignore --ignore-glob="node_modules|.git|tmp|.claude|dist|.next|notes"

# Step 2: Review the project rules:
- @notes/rules.md

# Step 3: Review the current codebase and analyze the following improvement items:
Think hard, analyze the existing codebase, and the following improvement items:

- [ ] improvement 1
- [ ] improvement 2
- [ ] improvement 3

# Step 4: Create a plan to address the identified improvement items:
- List out everything that needs to be done to implement the improvements in a todos list.
- For each item in the todos list, create a sub-agent to address it.
- Once the sub-agent has completed its task, it should report back with the results.
For my plugin, I filled in:
- Fix range slider issue in the admin UI
- Update button styles to match WordPress admin
- Clean up database operations
- Add better error handling
The prompt’s power comes from using sub-agents for each improvement. This ensures focused, surgical changes rather than sweeping refactors.

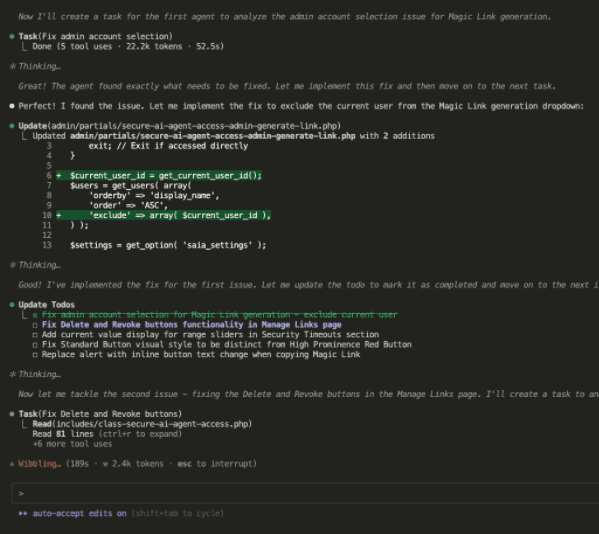
Small, targeted improvements.
No massive refactoring.
Just polish.
.
.
.
Why These Prompts Work
Looking at these prompts, you’ll notice a pattern:
- Always start with context – The
ezacommand shows Claude Code the project structure - Reference your documentation – Points to your rules and requirements files
- Use “Think hard” – Triggers deeper analysis mode
- Leverage sub-agents – Breaks complex tasks into focused chunks
- Enable web search – Keeps solutions current
This isn’t prompt engineering wizardry. It’s just clear communication that plays to Claude Code’s strengths.
.
.
.
The Results That Shocked Me
In less than an hour, I had a fully functional WordPress plugin that:
✅ Follows all WordPress coding standards
✅ Has proper security measures
✅ Includes internationalization support
✅ Works with multi-site installations
✅ Has a clean, WordPress-native admin interface
Zero coding required on my part.
.
.
.
The Secret Sauce: Preparation + Simplicity
Here’s the complete picture:
One-time preparation:
- Establish your WordPress development rules (once per technology)
For each plugin:
- Define requirements (5-10 min with a good template)
- Then follow the 3-step process:
- Wireframe with ASCII (5 min)
- Build with requirements + rules + wireframes (30 min)
- Improve what needs improving (15 min)
The magic is in the combination.
Clear requirements tell Claude what to build. Good rules tell it how to build. ASCII wireframes show it what it should look like.
Together, they eliminate 90% of the back-and-forth.
.
.
.
Your Turn: The 3-Step Challenge
Here’s my challenge to you:
- Pick a plugin idea (admin tool, utility function, anything)
- Prepare your foundation:
- Define your plugin requirements (use my prompt as a guide)
- Grab my WordPress development rules (Download here)
- Create a notes folder with rules.md and requirements.md
- Open Claude Code and use my prompts:
- Wireframe: Use my ASCII wireframe prompt (5 min)
- Build: Use my build prompt (30 min)
- Improve: Use my improvement prompt with your specific fixes (15 min)
That’s it.
One hour. One tool. One working plugin.
.
.
.
The Bottom Line
Building WordPress plugins doesn’t need to be complicated. It doesn’t require multiple tools, complex workflows, or deep technical knowledge.
It just requires:
- Clear requirements (quick to define with a template)
- Good development rules (created once, used forever)
- ASCII wireframes (visual clarity without code)
- The right prompts (copy mine and adapt them)
- Claude Code
- The willingness to let AI do the heavy lifting
The prompts I’ve shared aren’t magic formulas – they’re just clear instructions that work. Copy them, adapt them, make them yours.
Stop overcomplicating.
Start shipping.
What plugin will you build in your next hour?
P.S. – My ASCII-wireframe-to-working-plugin journey took 50 minutes. The plugin now lets ChatGPT agents manage all my WordPress sites securely. Here’s the code – fork it, improve it, or just use it. What will you build in your next hour?
Leave a Comment