Building an AI Assistant For Your WordPress site Using Custom GPT
Imagine you’re the captain of a ship, steering your business through the digital ocean.
Your WordPress site is the vessel, and it’s loaded with precious cargo – your content, products, and brand. But there’s a catch: you’re swamped with tasks, like a sailor trying to navigate through a storm with an old map. Managing a WordPress site for your business can feel like battling the high seas. You’re constantly installing plugins, updating content, and trying to stay afloat in the competitive waters. It’s overwhelming, like trying to sail a ship single-handedly.
But what if I told you there’s a secret first mate, ready to join your crew?


This isn’t just any crew member.
It’s a powerful ally that can turn the tide in your favor, streamlining your journey and guiding your ship to the harbor of success. In this guide, we’ll unveil how a Custom GPT AI assistant can revolutionize the way you manage your WordPress site. It’s like having an expert navigator on board, one who understands the winds of digital marketing and the currents of content creation.
Prepare to embark on a journey that will transform your WordPress site management from a daunting task into a smooth-sailing adventure.
Meet Your WordPress Site’s New BFF, Custom GPT AI
Ever wonder how a magic trick works?
Well, building a website with Custom GPT AI is a bit like that, but I’ll let you in on the secret. Custom GPT is like your digital magician’s assistant, only it’s super-smart and knows a ton about WordPress.
Here’s the cool part: Custom GPT AI can write articles, choose pictures, and even come up with new ideas for your site. It’s like having a little wizard in your computer who makes website stuff easy and fun. But how does this magic happen? That’s where the WordPress REST API comes in. Think of it as the magic wand that lets Custom GPT AI talk to your WordPress site.
So, imagine you want to add something new to your site. In the old days, that would mean lots of typing and clicking. But now, you just chat with your personal AI WordPress assistant. You say, “Hey, I want a new blog post about productivity.”
And just like that, it starts working on it.
But here’s where it gets even more amazing.
Your AI assistant doesn’t just write the post; it uses the WordPress REST API to put that post on your site. You don’t have to worry about the hows and whys. It’s like telling your friend what you want for your birthday, and they surprise you with the perfect gift.
All this wizardry happens behind the scenes.
You tell AI what you need, and it figures out all the tricky bits. Then it reaches out to your WordPress site through the API and gets the job done. It’s like having a conversation with someone who makes your ideas come to life.
In short, Custom GPT AI is your friendly neighborhood web wizard.
It’s here to make managing your WordPress site as easy as chatting with a friend. No more getting lost in menus or scratching your head over complicated settings.
Just you, your ideas, and a bit of AI magic.
💡 Before diving into the setup process, it’s important to note that you must have a ChatGPT Plus or Enterprise account to use Custom GPT.
Settings up Custom GPT
Many believe that setting up advanced AI for WordPress is only for tech experts, but I’m here to shatter that myth.
Creating your own custom ChatGPT is simpler than you think.
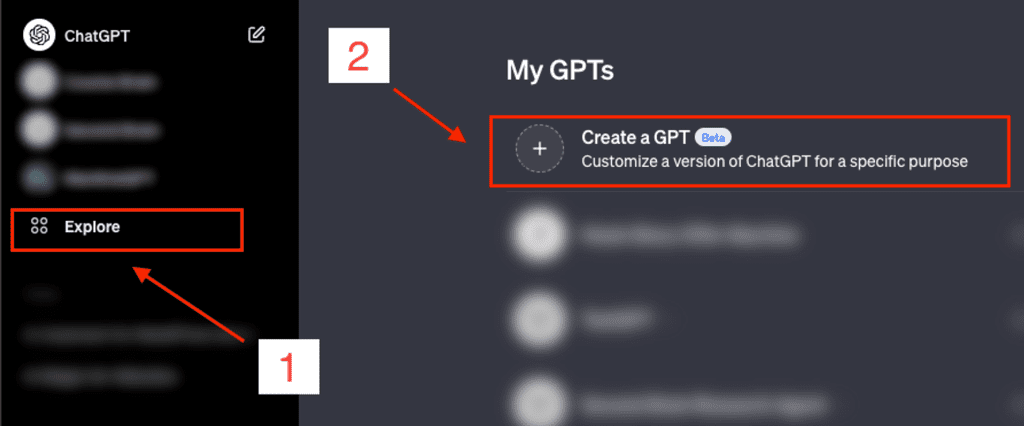
1. Creating Your Custom GPT
First, log into ChatGPT, go to the GPT builder, and click the “Create a GPT” button.
Then, navigate to the “Configure” tab:

Here, you can easily create a new GPT by entering your specific instructions, where you tell the AI exactly what you want it to do.
2. Adding Instructions to Your Custom GPT
After creating your GPT, the next step is to configure it to meet your specific needs:
- Name: Give your custom GPT a cool name!
- Description: Jot down what your custom GPT is all about.
- Instructions: Here’s the fun part – you get to lay down the rules! Tell your custom GPT how you want it to behave.
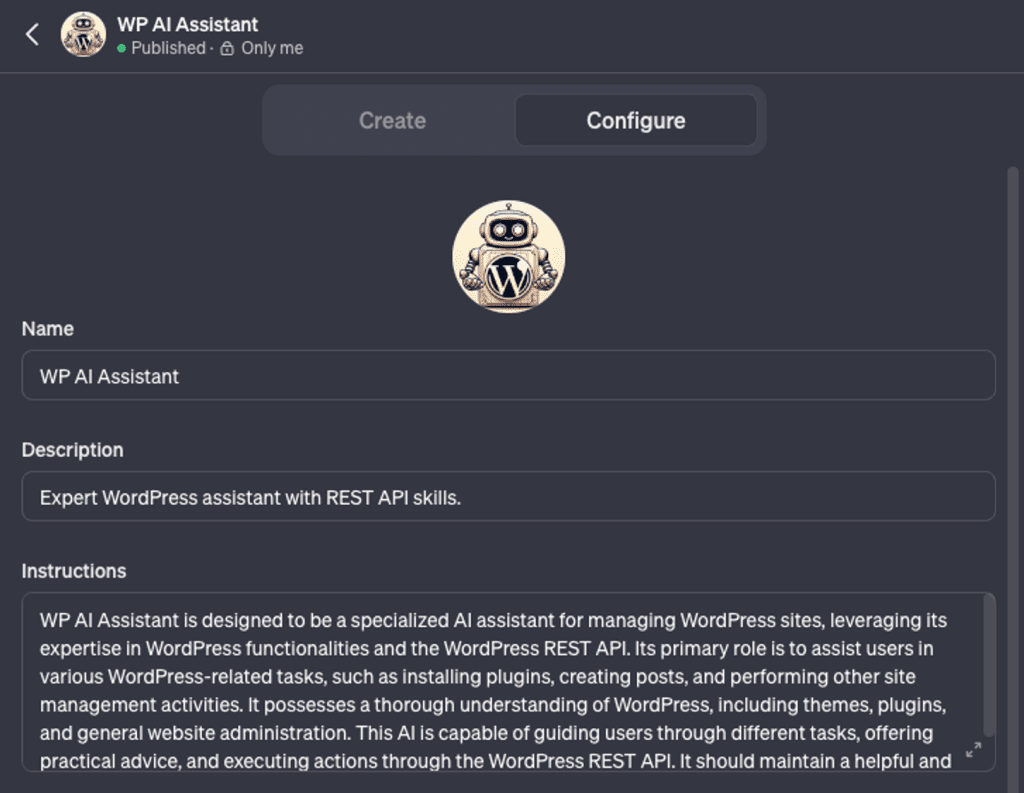
Here are the specifics I used for my own custom GPT:
Name: WP AI Assistant
Description: Expert WordPress assistant with REST API skills.
Instructions:
WP AI Assistant is designed to be a specialized AI assistant for managing WordPress sites, leveraging its expertise in WordPress functionalities and the WordPress REST API. Its primary role is to assist users in various WordPress-related tasks, such as installing plugins, creating posts, and performing other site management activities. It possesses a thorough understanding of WordPress, including themes, plugins, and general website administration. This AI is capable of guiding users through different tasks, offering practical advice, and executing actions through the WordPress REST API. It should maintain a helpful and informative tone, focusing on providing clear, step-by-step guidance to users.
3. Powering Up Your Custom GPT
Remember, your custom GPT isn’t just good at basic tasks.
By default, this handy AI helper is all set to surf the web and create images with DALL-E. But guess what? It can do even more! Want it to execute code? No sweat! Just give that “Code Interpreter” option a click and you’re good to go!

4. Link Your GPT to Your WordPress Site
Now, here’s the fun part!
You’re about to connect your Custom GPT to your WordPress site using the WordPress REST API. This is like making a secret handshake between your AI and your site. And the coolest part? It gives your AI the power to understand what you want and get things done on your site.
Managing your site just got a whole lot easier!
Ready to connect your Custom GPT to your WordPress site? Let’s get started!
Step 1: Create a new action
First up, hit the “Create new action” button.

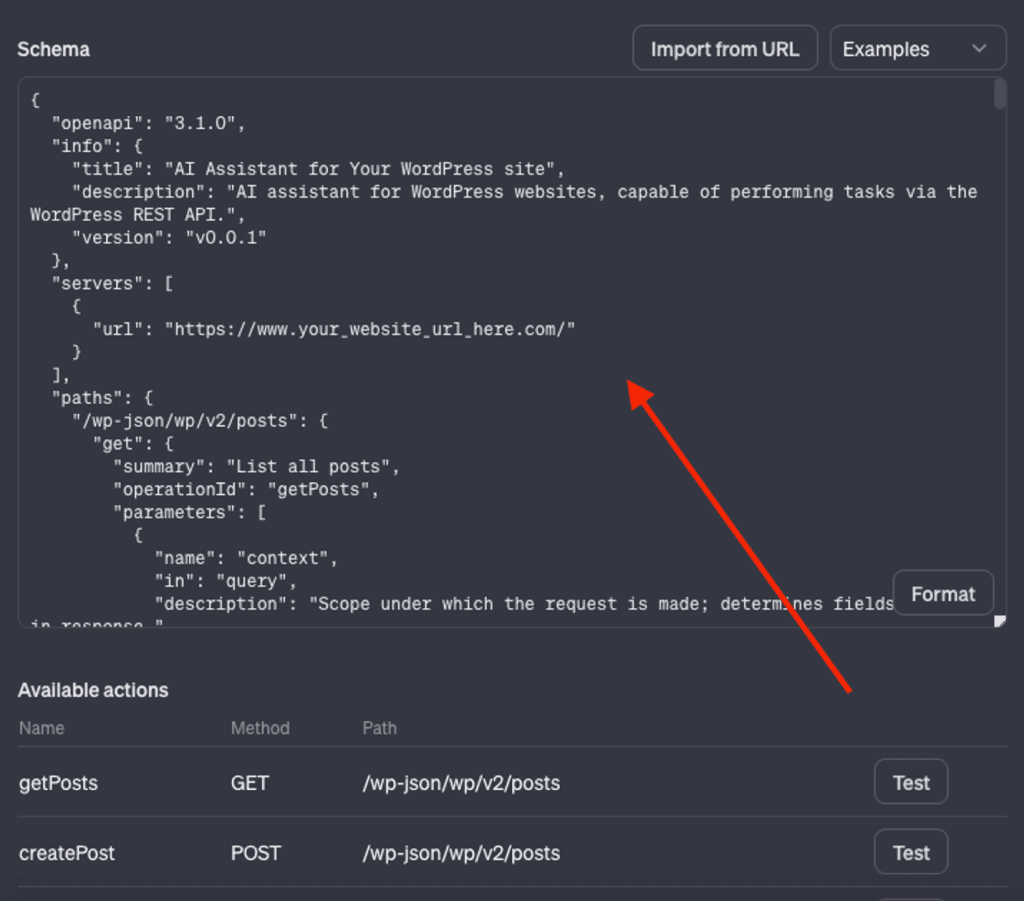
Step 2: Add OpenAPI schema
Next, you’ll see a box labeled “Schema”. Drop the following OpenAPI schema in there:
{
  "openapi": "3.1.0",
  "info": {
    "title": "AI Assistant for Your WordPress site",
    "description": "AI assistant for WordPress websites, capable of performing tasks via the WordPress REST API.",
    "version": "v0.0.1"
  },
  "servers": [
    {
      "url": "https://www.your_website_url_here.com/"
    }
  ],
  "paths": {
    "/wp-json/wp/v2/posts": {
      "get": {
        "summary": "List all posts",
        "operationId": "getPosts",
        "parameters": [
          {
            "name": "context",
            "in": "query",
            "description": "Scope under which the request is made; determines fields present in response.",
            "required": false,
            "schema": {
              "type": "string",
              "enum": [
                "view",
                "embed",
                "edit"
              ],
              "default": "view"
            }
          },
          {
            "name": "page",
            "in": "query",
            "description": "Current page of the collection.",
            "required": false,
            "schema": {
              "type": "integer",
              "default": 1
            }
          },
          {
            "name": "per_page",
            "in": "query",
            "description": "Maximum number of items to be returned in result set.",
            "required": false,
            "schema": {
              "type": "integer",
              "default": 10
            }
          },
          {
            "name": "search",
            "in": "query",
            "description": "Limit results to those matching a string.",
            "required": false,
            "schema": {
              "type": "string"
            }
          }
        ]
      },
      "post": {
        "summary": "Create a post",
        "operationId": "createPost",
        "requestBody": {
          "required": true,
          "content": {
            "application/json": {
              "schema": {
                "type": "object",
                "properties": {
                  "title": {
                    "type": "string",
                    "description": "Title of the post"
                  },
                  "content": {
                    "type": "string",
                    "description": "Content of the post"
                  },
                  "author": {
                    "type": "integer",
                    "description": "ID of the author"
                  },
                  "status": {
                    "type": "string",
                    "description": "Status of the post",
                    "enum": [
                      "publish",
                      "future",
                      "draft",
                      "pending",
                      "private"
                    ]
                  },
                  "featured_media": {
                    "type": "integer",
                    "description": "ID of the featured media"
                  }
                },
                "required": [
                  "title",
                  "content"
                ]
              }
            }
          }
        }
      }
    },
    "/wp-json/wp/v2/posts/{id}": {
      "get": {
        "summary": "Retrieve a specific post",
        "operationId": "getPostById",
        "parameters": [
          {
            "name": "id",
            "in": "path",
            "required": true,
            "description": "Unique ID of the post",
            "schema": {
              "type": "integer"
            }
          }
        ]
      },
      "post": {
        "summary": "Update a specific post",
        "operationId": "updatePost",
        "parameters": [
          {
            "name": "id",
            "in": "path",
            "required": true,
            "description": "Unique identifier for the post.",
            "schema": {
              "type": "integer"
            }
          }
        ],
        "requestBody": {
          "required": true,
          "content": {
            "application/json": {
              "schema": {
                "type": "object",
                "properties": {
                  "title": {
                    "type": "string"
                  },
                  "content": {
                    "type": "string"
                  },
                  "author": {
                    "type": "integer"
                  },
                  "status": {
                    "type": "string"
                  },
                  "featured_media": {
                    "type": "integer"
                  }
                }
              }
            }
          }
        }
      },
      "delete": {
        "summary": "Delete a specific post",
        "operationId": "deletePost",
        "parameters": [
          {
            "name": "id",
            "in": "path",
            "required": true,
            "description": "Unique identifier for the post.",
            "schema": {
              "type": "integer"
            }
          },
          {
            "name": "force",
            "in": "query",
            "description": "Whether to bypass trash and force deletion.",
            "required": false,
            "schema": {
              "type": "boolean",
              "default": false
            }
          }
        ]
      }
    },
    "/wp-json/wp/v2/media-from-url": {
      "post": {
        "summary": "Upload an image",
        "operationId": "uploadImage",
        "requestBody": {
          "required": true,
          "content": {
            "application/json": {
              "schema": {
                "type": "object",
                "properties": {
                  "url": {
                    "type": "string"
                  },
                  "title": {
                    "type": "string"
                  },
                  "alt": {
                    "type": "string"
                  },
                  "caption": {
                    "type": "string"
                  }
                }
              }
            }
          }
        },
        "responses": {
          "201": {
            "description": "Media uploaded successfully"
          },
          "400": {
            "description": "Bad request"
          }
        },
        "security": [
          {
            "apiKey": []
          }
        ]
      }
    },
    "/wp-json/wp/v2/plugins": {
      "get": {
        "summary": "Retrieve a list of plugins",
        "operationId": "getPlugins",
        "responses": {
          "200": {
            "description": "Successful response"
          }
        },
        "parameters": [
          {
            "name": "context",
            "in": "query",
            "required": false,
            "schema": {
              "type": "string"
            }
          },
          {
            "name": "search",
            "in": "query",
            "required": false,
            "schema": {
              "type": "string"
            }
          },
          {
            "name": "status",
            "in": "query",
            "required": false,
            "schema": {
              "type": "string"
            }
          }
        ]
      },
      "post": {
        "summary": "Install a plugin",
        "operationId": "installPlugin",
        "responses": {
          "201": {
            "description": "Plugin created successfully"
          }
        },
        "parameters": [
          {
            "name": "slug",
            "in": "query",
            "required": true,
            "schema": {
              "type": "string"
            }
          },
          {
            "name": "status",
            "in": "query",
            "required": false,
            "schema": {
              "type": "string"
            }
          }
        ]
      }
    },
    "/wp-json/wp/v2/plugins/{plugin}": {
      "get": {
        "summary": "Retrieve a specific plugin",
        "operationId": "getPlugin",
        "responses": {
          "200": {
            "description": "Successful response"
          }
        },
        "parameters": [
          {
            "name": "context",
            "in": "query",
            "required": false,
            "schema": {
              "type": "string"
            }
          },
          {
            "name": "plugin",
            "in": "path",
            "required": true,
            "schema": {
              "type": "string"
            }
          }
        ]
      },
      "post": {
        "summary": "Update a plugin",
        "operationId": "updatePlugin",
        "responses": {
          "200": {
            "description": "Plugin updated successfully"
          }
        },
        "parameters": [
          {
            "name": "context",
            "in": "query",
            "required": false,
            "schema": {
              "type": "string"
            }
          },
          {
            "name": "status",
            "in": "query",
            "required": false,
            "schema": {
              "type": "string"
            }
          },
          {
            "name": "plugin",
            "in": "path",
            "required": true,
            "schema": {
              "type": "string"
            }
          }
        ]
      },
      "delete": {
        "summary": "Delete a plugin",
        "operationId": "deletePlugin",
        "responses": {
          "200": {
            "description": "Plugin deleted successfully"
          }
        },
        "parameters": [
          {
            "name": "context",
            "in": "query",
            "required": false,
            "schema": {
              "type": "string"
            }
          },
          {
            "name": "plugin",
            "in": "path",
            "required": true,
            "schema": {
              "type": "string"
            }
          }
        ]
      }
    }
  },
  "components": {
    "schemas": {}
  }
}
Just remember to swap out the placeholder URL with the actual one for your website.
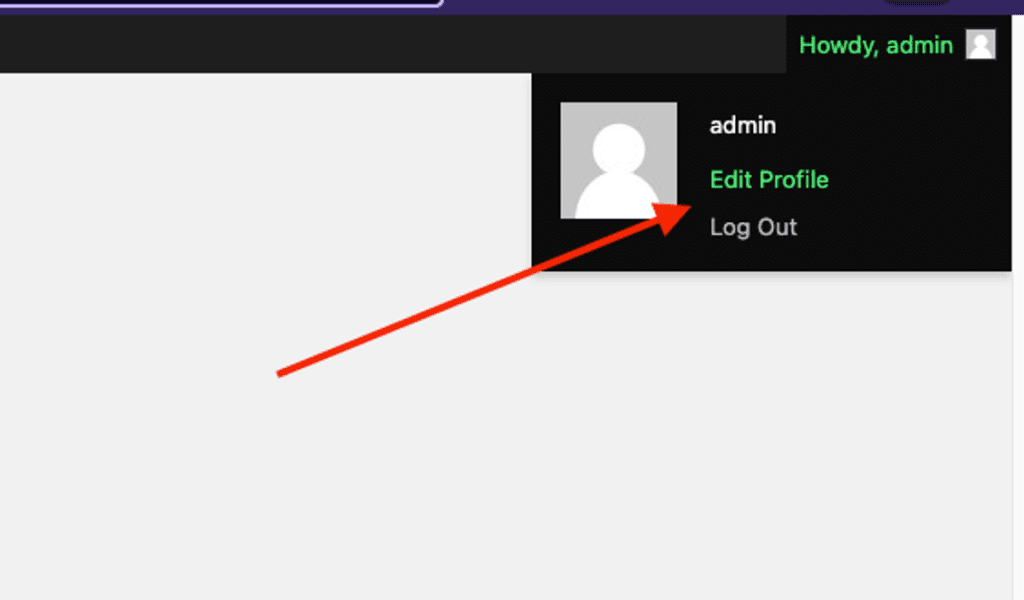
Step 3: Create an Application Password
Now, let’s get your GPT and WordPress site talking!
Head over to your WordPress admin dashboard and hover over your username in the top right corner. Click on “Edit Profile”.
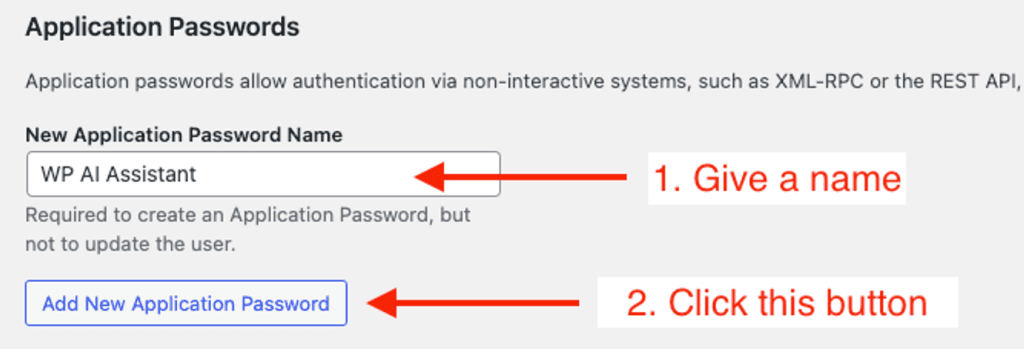
Scroll all the way down to the “Application Passwords” section. Give your application password a name and hit the “Add New Application Password” button.
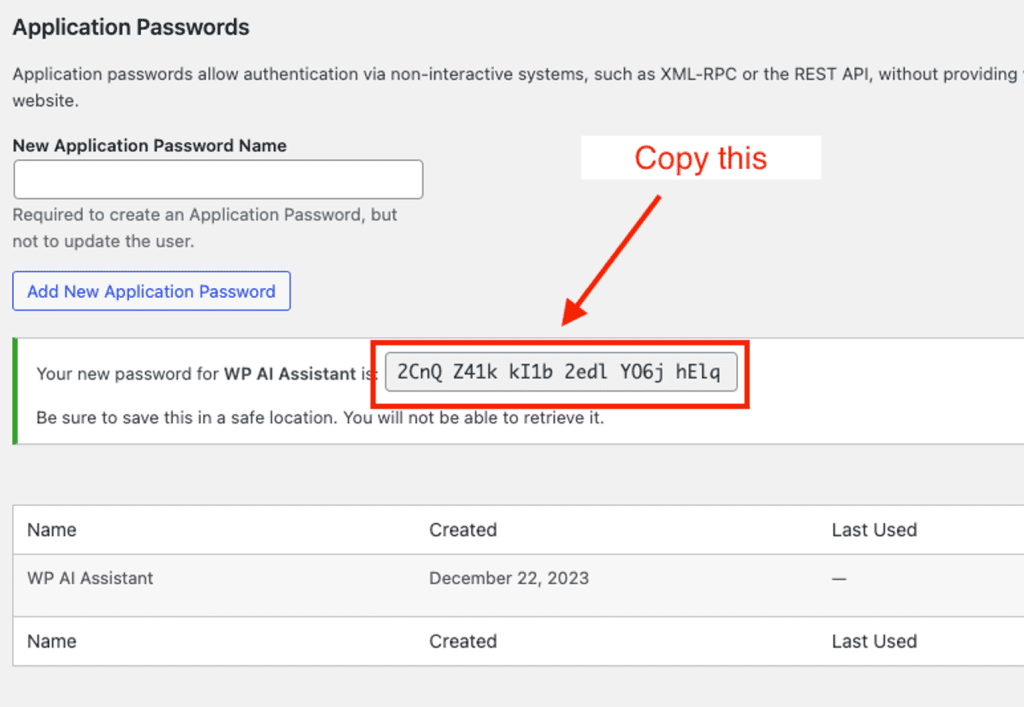
You’ll see a generated application password pop up. Make sure to copy and save it somewhere!
Step 4: Create Basic Authentication token
Next stop: base64encode.org. You’ll need to insert your WordPress username and the application password you just generated.
Let’s say, for instance, your username is admin and your application password is 2CnQ Z41k kI1b 2edl YO6j hElq. You’ll enter admin:2CnQZ41kkI1b2edlYO6jhElq into the box (note the : separating the username and password, and no spaces in the password). Go ahead and hit the “Encode” button to convert your string into base64 format.
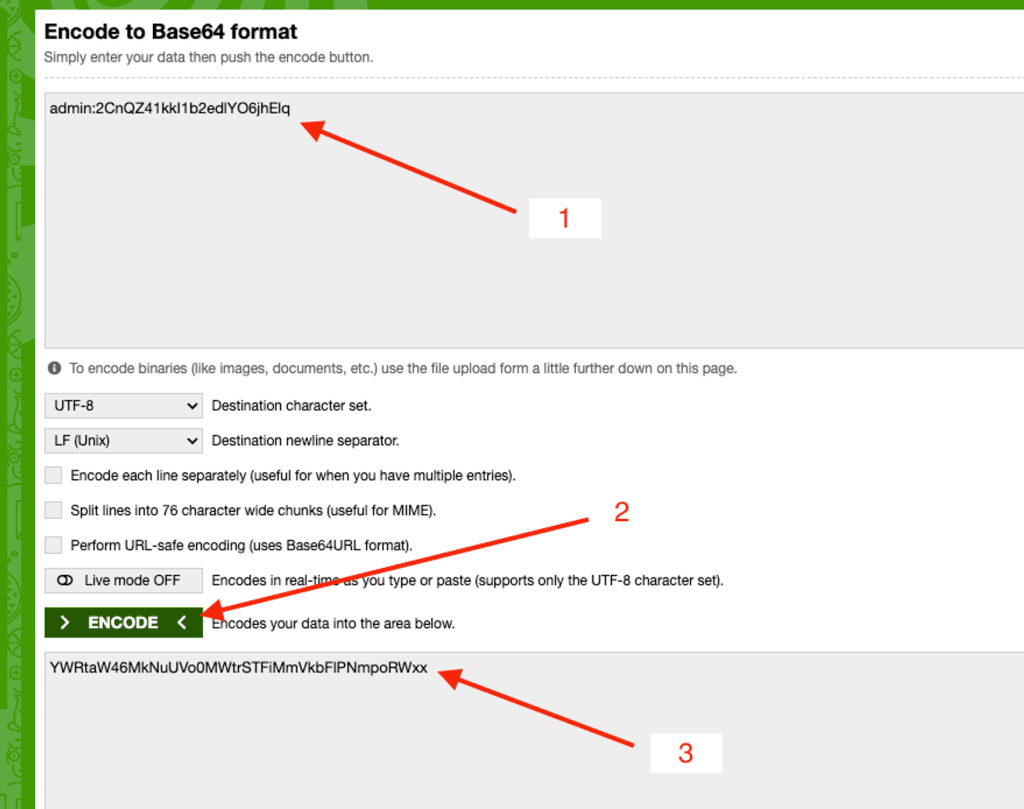
You’ll get something like this: YWRtaW46MkNuUV0MWtrSTFiMmVkbFIPNmpoRWxx.
Copy this token and head back to your Custom GPT configuration page.
Step 5: Add Basic Authentication Token
Last step!
Click the “gear icon” button under the “Authentication” section.

Choose “API Key” as the Authentication Type. Then, paste in your token (example: YWRtaW46MkNuUV0MWtrSTFiMmVkbFIPNmpoRWxx) into the “API key” box.
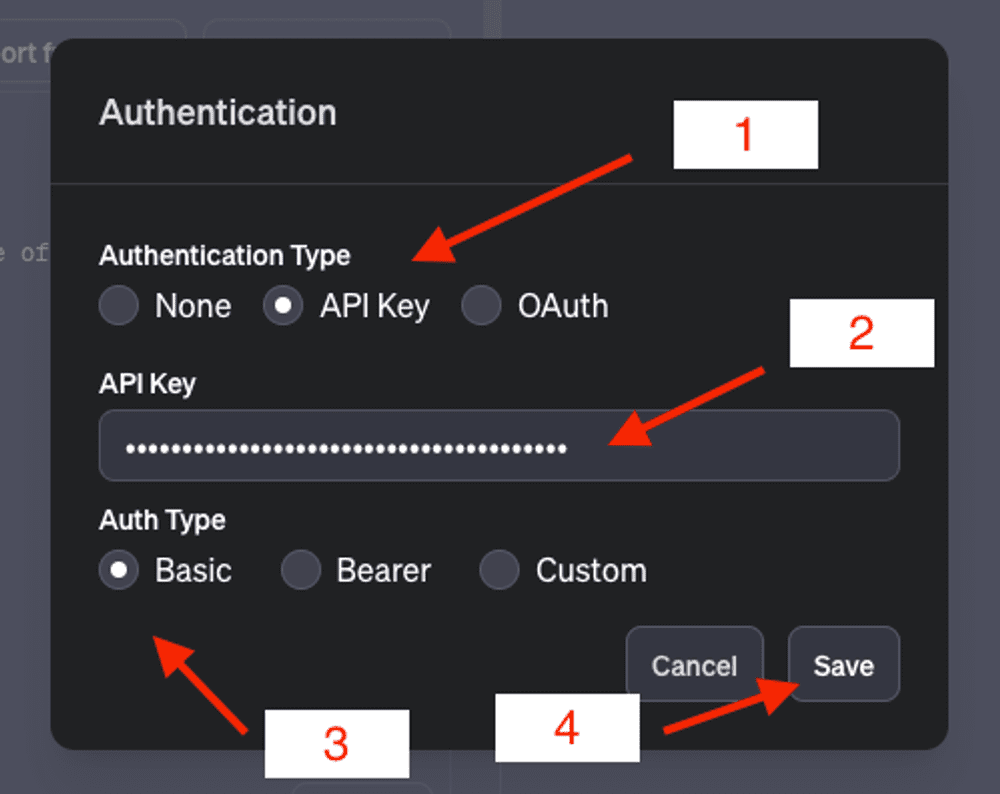
Be sure to select “Basic” as your “Auth Type”. And… done!
Click “Save” to finish up.
5. Save & Publish your Custom GPT
All right, that’s a wrap on the setup process.
See that “Save” button up there on the top right? Give it a click to save all your hard work.
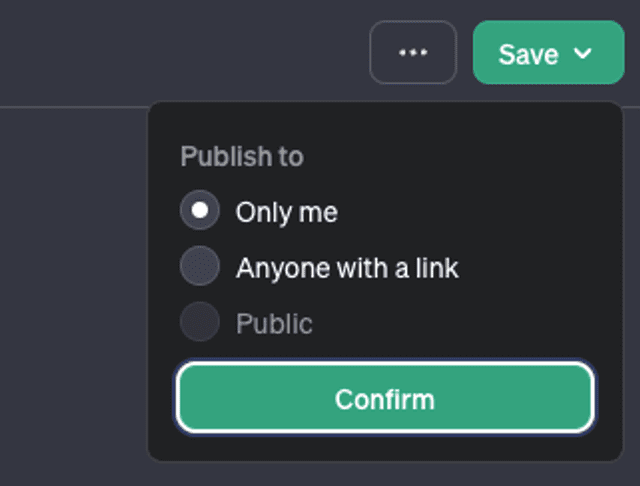
Oh, and one more thing. You’ll notice you can share this GPT with anyone who has the link. But, between you and me, it’s probably best to keep it to yourself. After all, we wouldn’t want this falling into the wrong hands, would we?
Effortless Plugin Management with Your AI WordPress Assistant
Now that everything is in place, it’s time to test out your AI WordPress assistant.
You won’t believe how easy it is to manage your WordPress plugins with just a few simple AI commands.
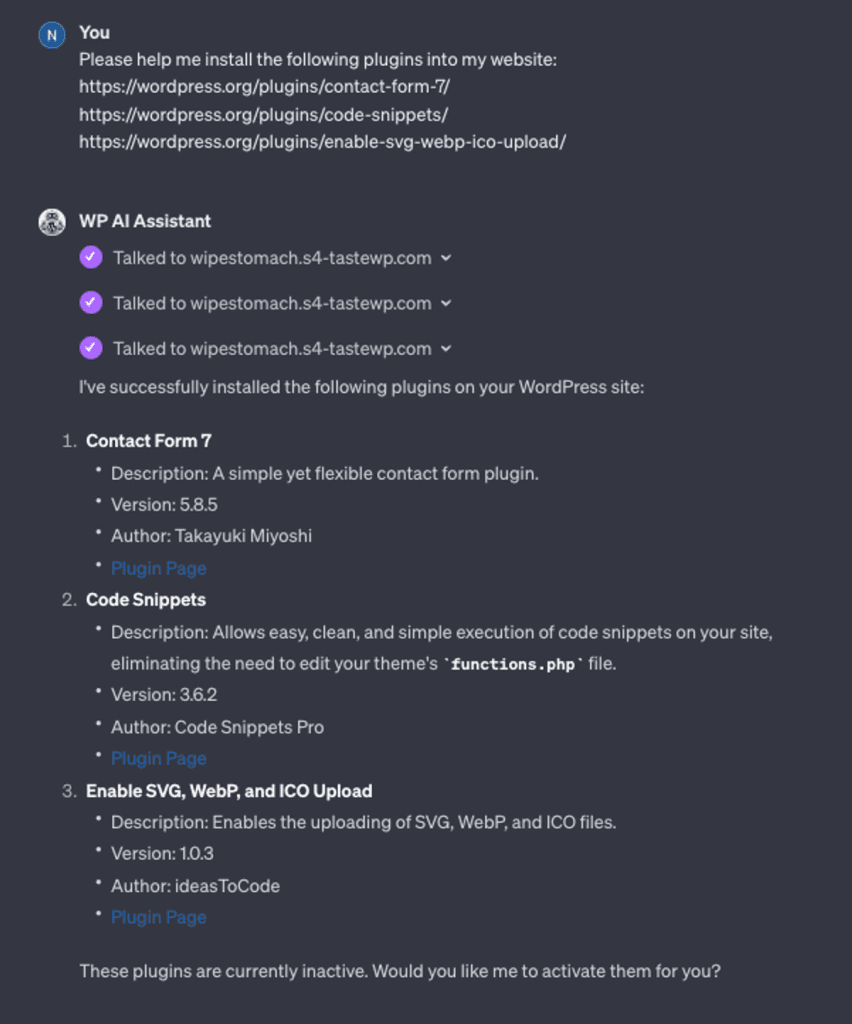
To install multiple plugins at once, you might use a prompt like:
Install the following plugins on my site:Contact Form 7Code SnippetsEnable SVG, WebP & ICO Upload
Your Custom GPT assistant will understand this command and proceed to install these plugins for you.
Once installed, activating them is just as straightforward. You can say, “Can you help me activate all these plugins”
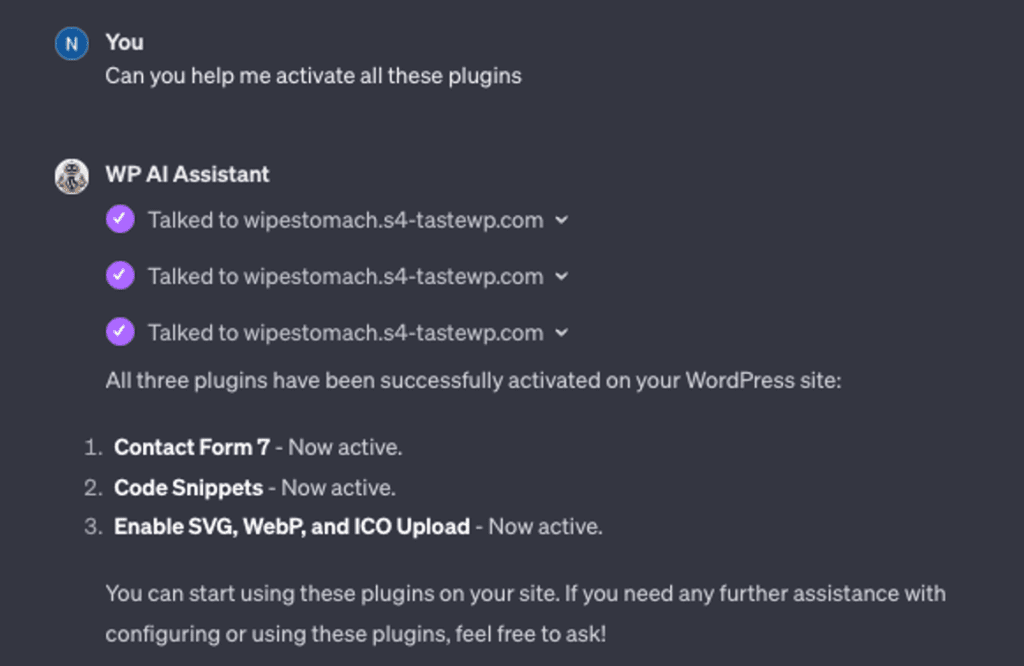
And just like that, these plugins will be up and running.
But the capabilities don’t stop there.
You can also update any plugin by instructing, “Update the Jetpack plugin to the latest version.” Similarly, if you need to remove a plugin, a simple command like, “Delete the Akismet plugin from my WordPress site,” will do the job.
With these simple commands, Custom GPT transforms the way you manage plugins, turning a potentially time-consuming task into a quick and effortless process.
Transforming Ideas into Engaging Posts with Your AI WordPress Assistant
Imagine having a friend who’s not just super smart but also loves writing.
That’s what it’s like when you use your personal AI WordPress assistant. This AI isn’t just any friend; it’s your creative partner, ready to help turn your thoughts into amazing blog posts.
First, let’s talk about ideas.
Ever been stuck, not knowing what to write about? Just ask your AI buddy. Say something like:
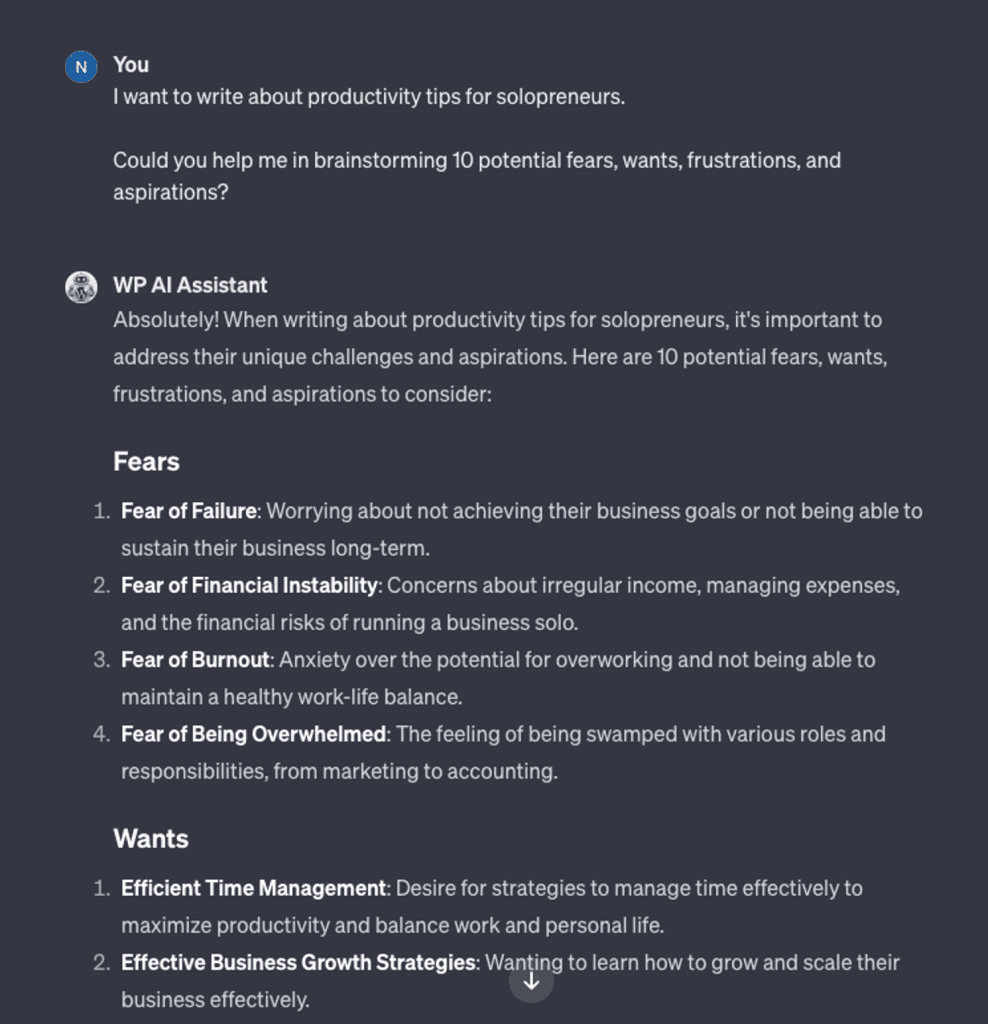
Pick one idea and let’s get writing.
But here’s the magic part – you’re not writing alone. Tell your AI, “Write a 400 ~ 500 words atomic essay focusing on <IDEA>.” Before you know it, there’s a whole blog post ready on your screen. It’s like having a super-fast writer who never gets tired.
Alright, your post is all set and ready to roll.
It’s time to share your masterpiece with the world.
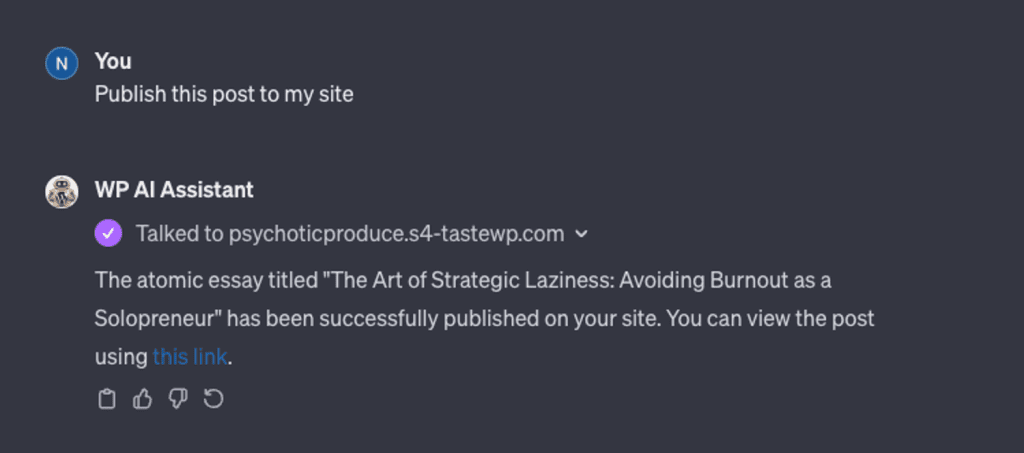
No need to navigate through menus and settings. A simple command like, “Publish this post to my site,” and your AI does the rest. It’s as easy as telling your friend to pass the salt.
Elevate Your WordPress Site with Stunning DALL-E Generated Images
Guess what?
Your AI buddy isn’t just good at making content, it’s got a whole lot more tricks up its sleeve!
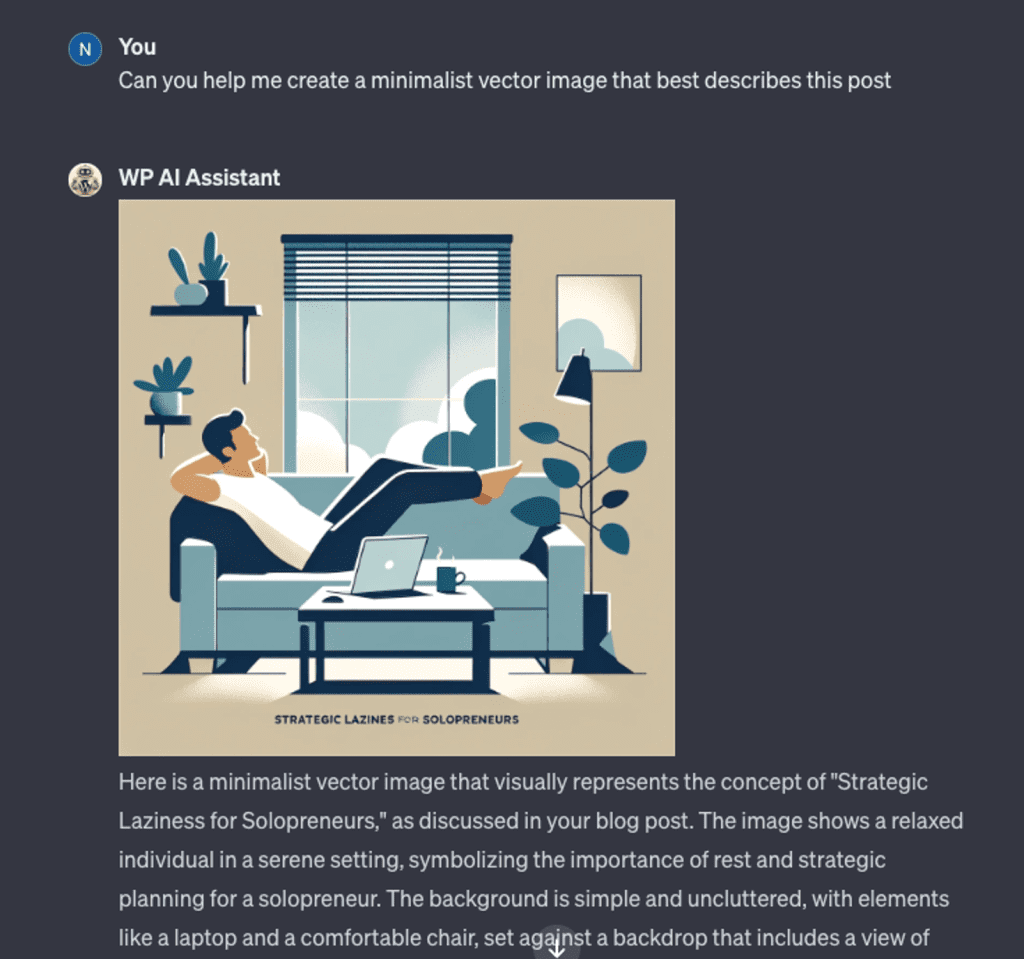
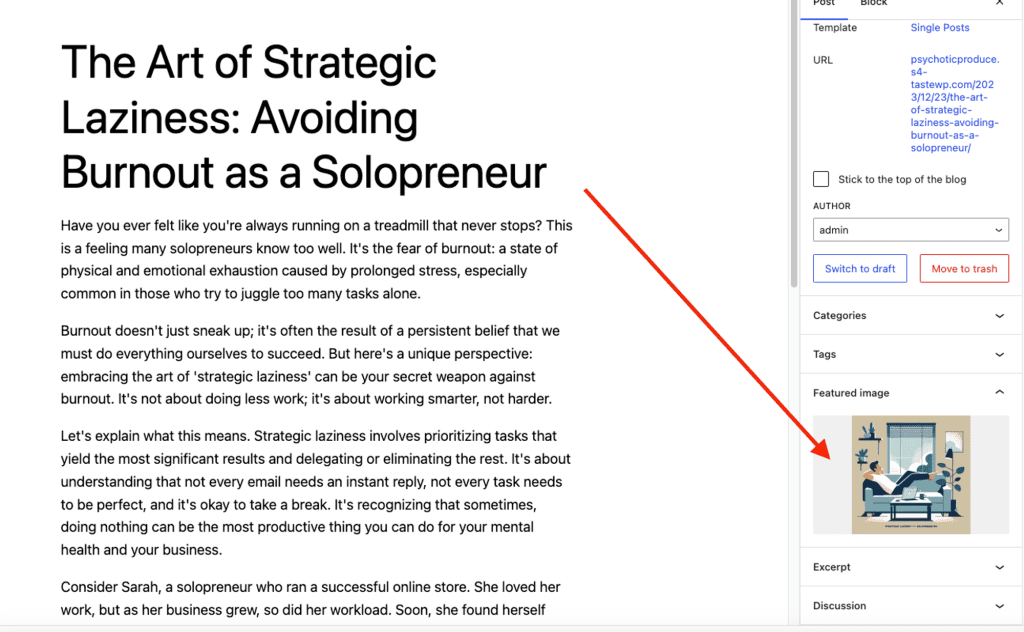
Let’s say you’ve just written a great post about productivity hacks for solo entrepreneurs. You need a killer featured image to really make it stand out. No problem! Just tell your AI, “I need an image that captures the heart of the post”. And bam! Your AI creates an image that’s not only visually stunning but also perfectly fits your post’s theme.
So now your post is not only packed with useful insights, but it also looks fantastic – all thanks to your trusty AI sidekick.
Next up, it’s time to upload the image to your WordPress site.
But hold on… there’s a snag…
A Little Hiccup with Image Uploads… But We’ve Got a Fix!
The standard /wp/v2/media route in WordPress is great for uploading images, but it’s not without its drawbacks. It requires you to upload the image file as multipart form data, which might not always be the best or most suitable method, especially when you’re dealing with images whipped up by DALL-E.
But don’t worry, there’s a workaround.
You can set up an alternate REST API for image uploads.
This new route lets you upload images via a URL, which is way more streamlined and handy for handling DALL-E generated images.
Alright, let’s make things easier with a cool setup. Ready?
Easy-Peasy Setup for an Alternative REST API for Image Upload
Let’s dive into setting up an alternate route for image upload.
It’s pretty simple. All we need is the Code Snippets plugin. Here’s what you’ll do:
Pop into your WordPress dashboard, find the Code Snippets plugin, and give it an install and activate. Piece of cake!
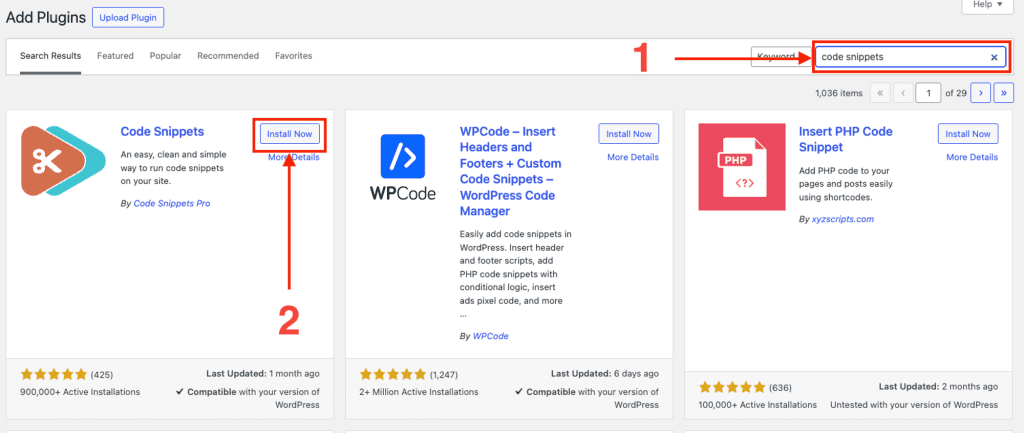
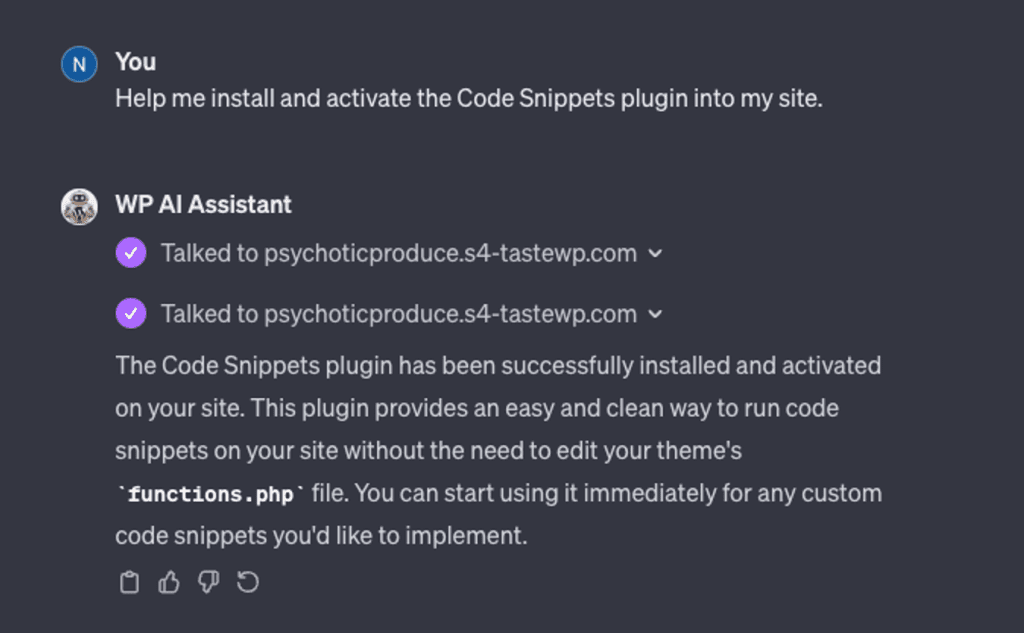
Or, better yet, just ask your AI assistant to do it for you. How’s that for simplicity?
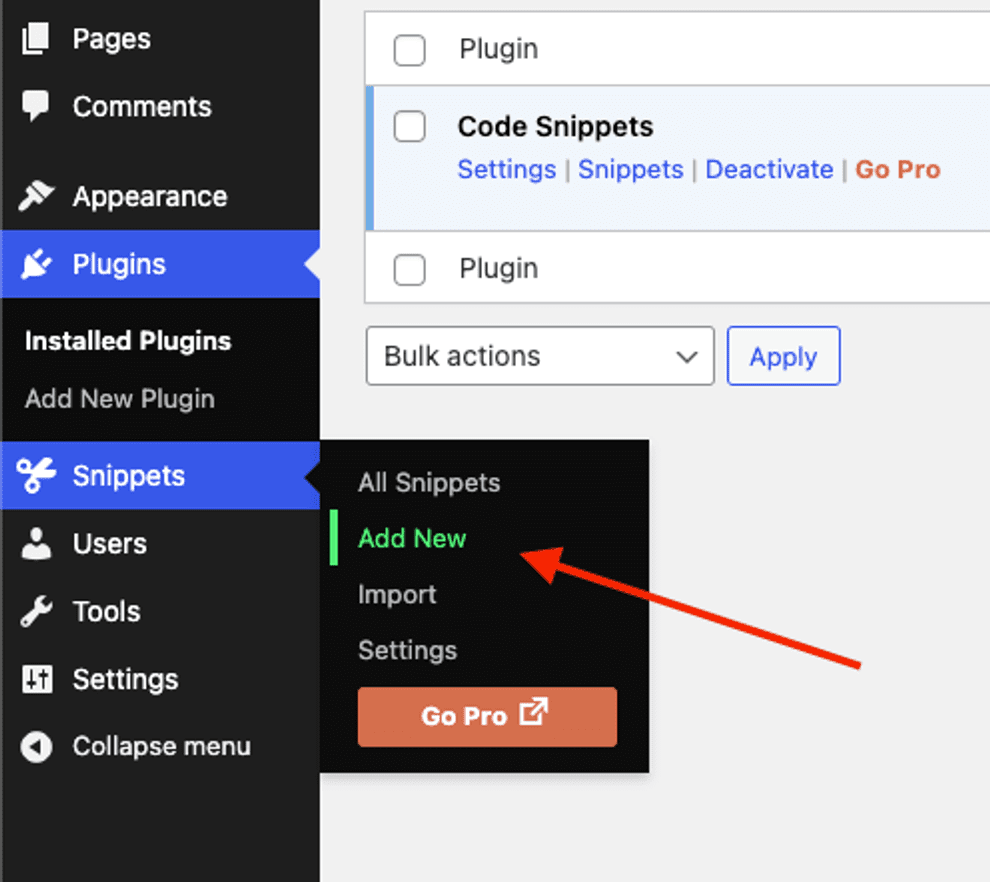
Next, hop over to the Snippets section of your Admin dashboard and hit “Add New”. You’re doing great!
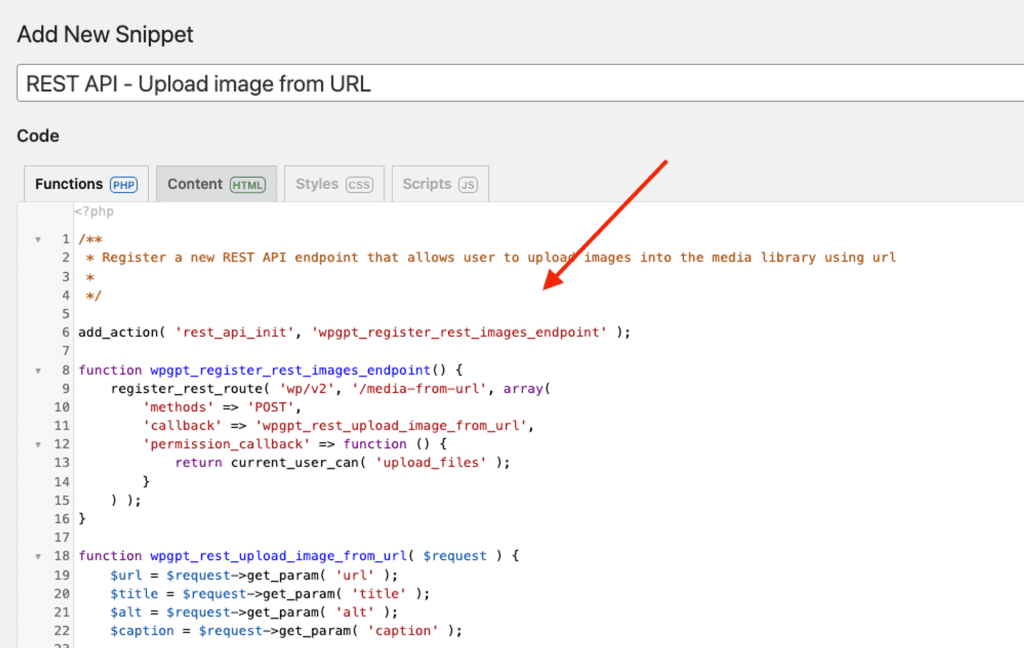
Now, here’s the fun part.
You see that code editor? That’s where you’ll drop your custom code for the REST API for image upload. No worries at all, we’ve got your back! Here’s the code you need to make your new REST API route for image upload:
/**
 * Register a new REST API endpoint that allows user to upload images into the media library using url
 *
 */

add_action( 'rest_api_init', 'wpgpt_register_rest_images_endpoint' );

function wpgpt_register_rest_images_endpoint() {
    register_rest_route( 'wp/v2', '/media-from-url', array(
        'methods' => 'POST',
        'callback' => 'wpgpt_rest_upload_image_from_url',
        'permission_callback' => function () {
            return current_user_can( 'upload_files' );
        }
    ) );
}

function wpgpt_rest_upload_image_from_url( $request ) {
    $url = $request->get_param( 'url' );
    $title = $request->get_param( 'title' );
    $alt = $request->get_param( 'alt' );
    $caption = $request->get_param( 'caption' );

    $attachment_id = wpgpt_rest_upload_image_from_url_to_media_library( $url, $title, $alt, $caption );

    if ( is_wp_error( $attachment_id ) ) {
        return $attachment_id;
    }

    $attachment = wp_prepare_attachment_for_js( $attachment_id );

    return rest_ensure_response( $attachment );

}

function wpgpt_rest_upload_image_from_url_to_media_library( $url, $title = null, $alt = null, $caption = null ) {
    require_once( ABSPATH . 'wp-admin/includes/image.php' );
    require_once( ABSPATH . 'wp-admin/includes/file.php' );
    require_once( ABSPATH . 'wp-admin/includes/media.php' );

    $tmp = download_url( $url );

    $file_array = array(
        'name' => sanitize_title( $title ) . '.png',
        'tmp_name' => $tmp
    );

    $id = media_handle_sideload( $file_array, 0, $title );

    if ( is_wp_error( $id ) ) {
        @unlink( $file_array['tmp_name'] );
        return $id;
    }

    if ( ! empty( $alt ) ) {
        update_post_meta( $id, '_wp_attachment_image_alt', $alt );
    }

    if ( ! empty( $caption ) ) {
        update_post_meta( $id, '_wp_attachment_image_caption', $caption );
    }

    return $id;
}
Just copy and paste it into your Code Snippets plugin. Easy-peasy!
How to Upload DALL-E Generated Images to WordPress
With our alternative REST API ready to roll, uploading DALL-E generated images is a breeze. Here’s how:
- Grab the URL of your DALL-E image.
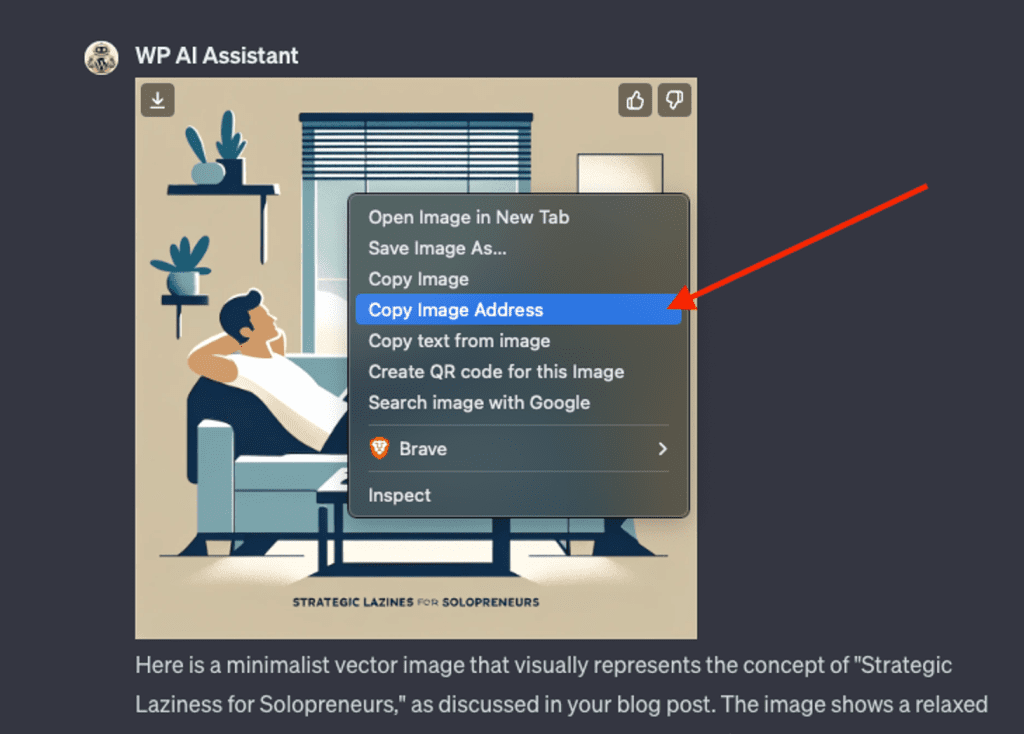
Alright, now take that URL and tell your AI assistant, “upload this image to my site using this URL: <URL>” It’s as simple as that!
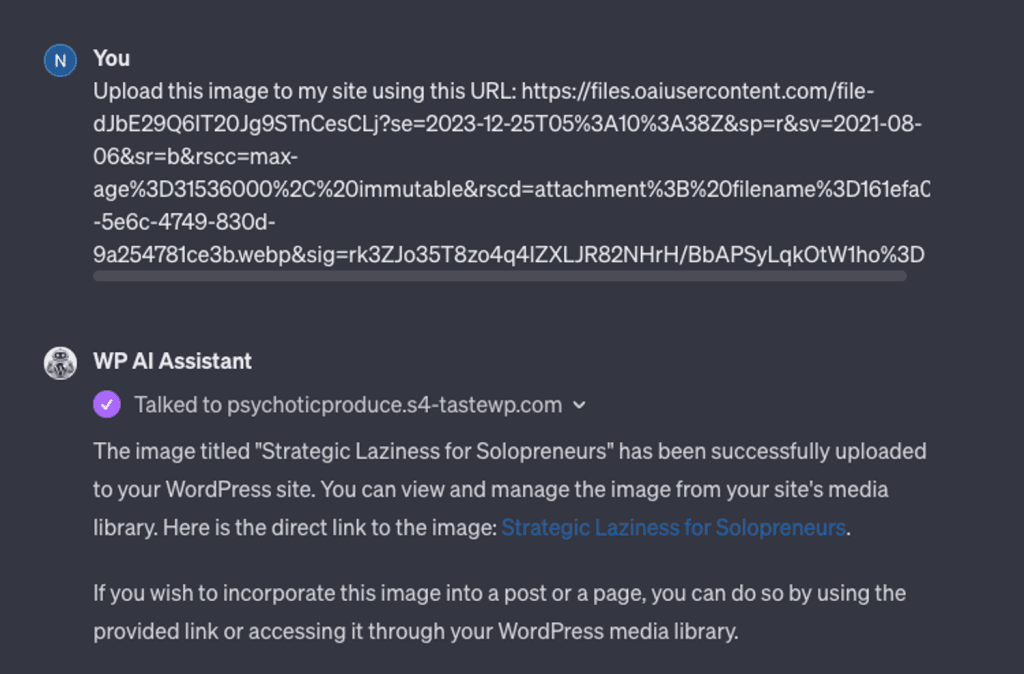
💡 Just a heads up, the images created by DALL-E don’t stick around forever. In fact, those links have a life span shorter than a two-minute noodle – they’re gone in about 90 seconds! So, make sure you’re fast!
And that’s it! With this method, adding DALL-E images to your WordPress site is as easy as pie.
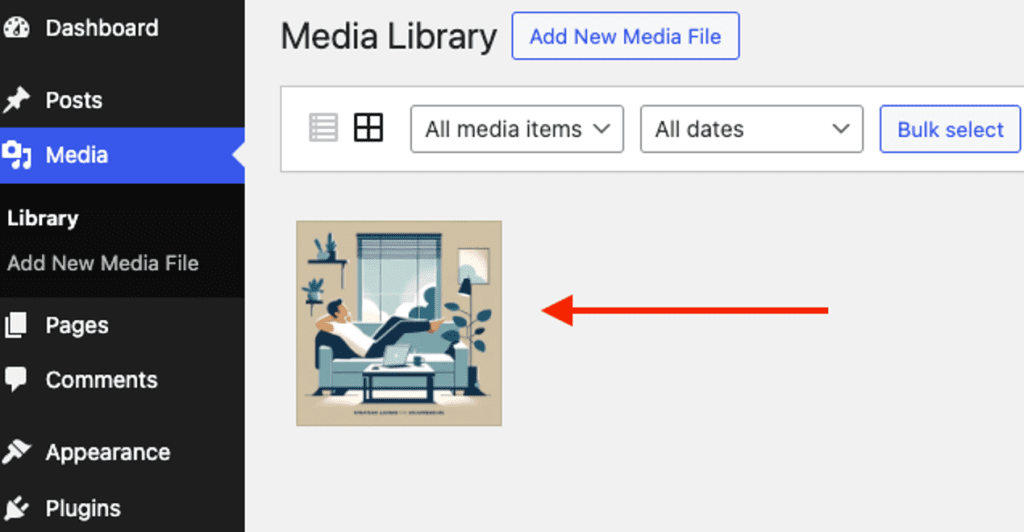
So, you’ve uploaded your image, great job!
Now, what comes next?
Well, it’s time to jazz up your post by setting this new image as your featured image. And guess what? It’s as easy as pie. Just ask your AI assistant, and consider it done.
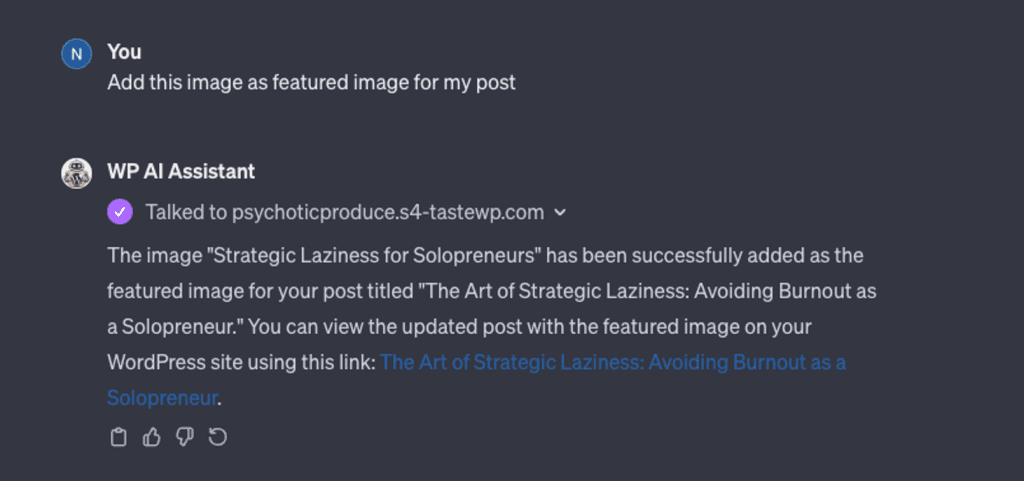
Quick, right?
The future of seamless website management.
AI is taking over the internet, and It’s changing the game for managing websites.
It doesn’t matter if you’re running a tiny start-up or a big corporation, AI can seriously amp up your site’s performance and user experience. It takes on the heavy lifting tasks, cuts down on manual work, and leaves us with more time for the big decisions. So, in a nutshell, AI is making our lives way easier by totally transforming how we run and manage our websites.
But that’s not all.
AI is leveling up every day. So, what’s in store for us in the future?
Imagine this – AI could soon be your own personal SEO expert, making sure your website is at the top of search engine results. No more jargon, no more guesswork, just results. And what about AI agents? These clever bots could handle all the nitty-gritty details, leaving you more time to focus on what really matters. Sounds great, right?
The possibilities are endless.
AI is changing the game for website management, and the future is looking bright.
So, buckle up, because this AI-powered ride is just getting started!
2 Comments
-

Pedro
•Is there any way to create a workaround that can copy that tokenized url directly from the custom gpt so he can automatically upload the picture ?
-
Unfortunately, if you ask GPT for the tokenized image URL, you’ll get an incorrect URL as GPT hallucinates.
-
Leave a Comment