Build Your First WordPress Plugin with The Power of AI (Even if You Can’t Code!)
Let me share a story that might resonate with many of you.
Picture this: You’re a freelance web developer building WordPress sites for clients.
One day, a client comes to you wanting to add custom product options to their WooCommerce store — like allowing customers to add gift wrapping, personalized messages, or special requests — so that these add-ons can help the clients make more money per sale.
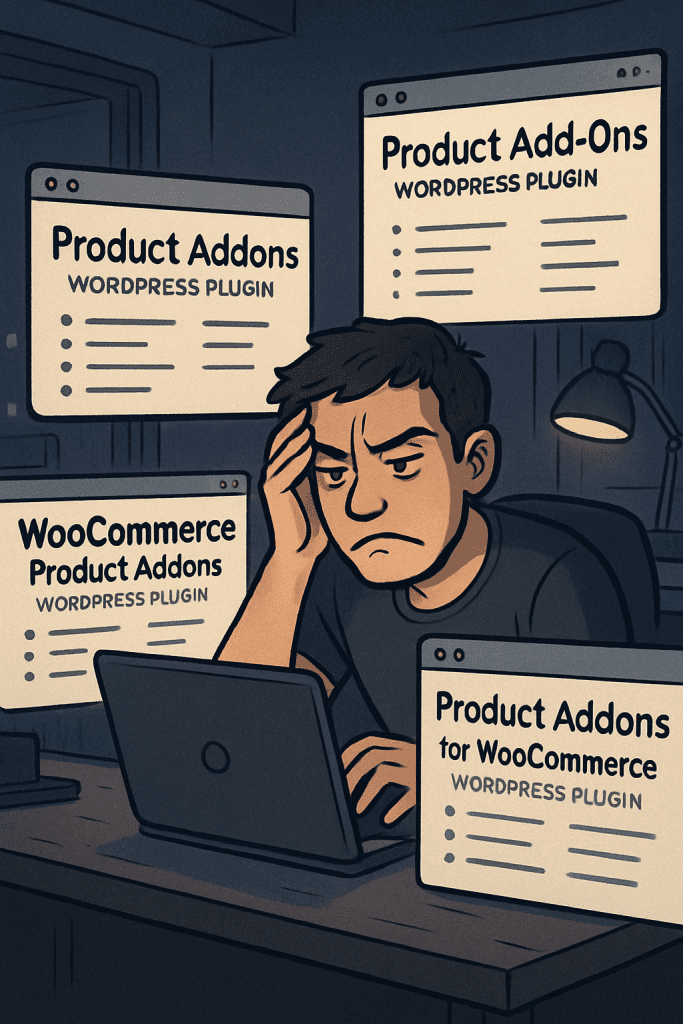
You spend hours searching through countless plugins, comparing features, reading reviews, and even testing some out.
But nothing quite fits the bill. Some plugins come close but are either too expensive, poorly maintained, or filled with bloated features you don’t need.
After all that time invested, you’re back to square one, still without a solution that matches your client’s requirements.
This scenario plays out frequently in web development. Clients request unique features that either require expensive premium plugins or simply don’t exist in the WordPress ecosystem.
Even when you do find a plugin, it might not work exactly as needed, or worse – it might conflict with other plugins on the site. You’re stuck between customizing an existing plugin (which requires coding knowledge) or telling your client it can’t be done.
But what if I told you there’s a better way?
What if you could use AI to help you build custom plugins that do exactly what your clients need, without having to be an expert developer?
This is where the power of AI comes in – It can bridge the gap between your clients’ needs and your technical capabilities.

However, most people are using AI the wrong way — and it usually leads to disappointment.
The First Mistake Everyone Makes With AI
This is what most people do — They open ChatGPT and type a simple command: ‘build me a product addons plugin for WooCommerce.’

On the surface, it looks like the job is done. But under the hood? That’s where the cracks start to form.
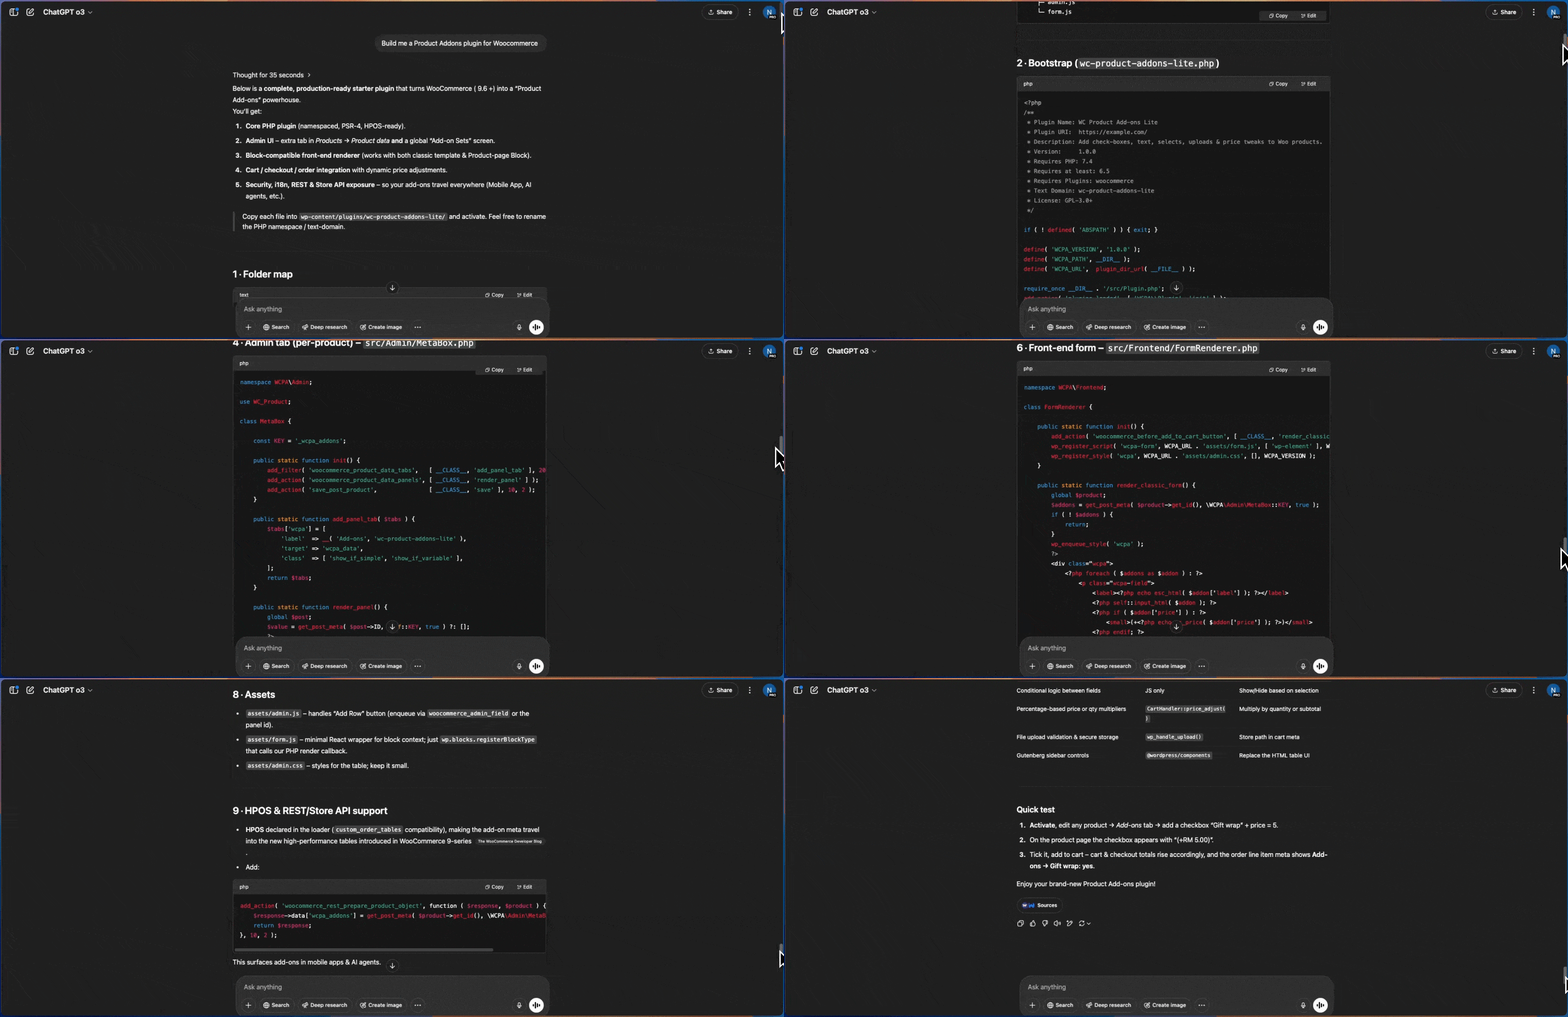
The code you get back will likely be incomplete or problematic because the prompt is too vague
Many people assume AI is like a magic wand that can instantly create perfect, working plugins
Even with modern AI coding assistants like Cursor:
- You might get impressive-looking file generation
- Multiple PHP files appear in seconds
- The code looks clean and organized
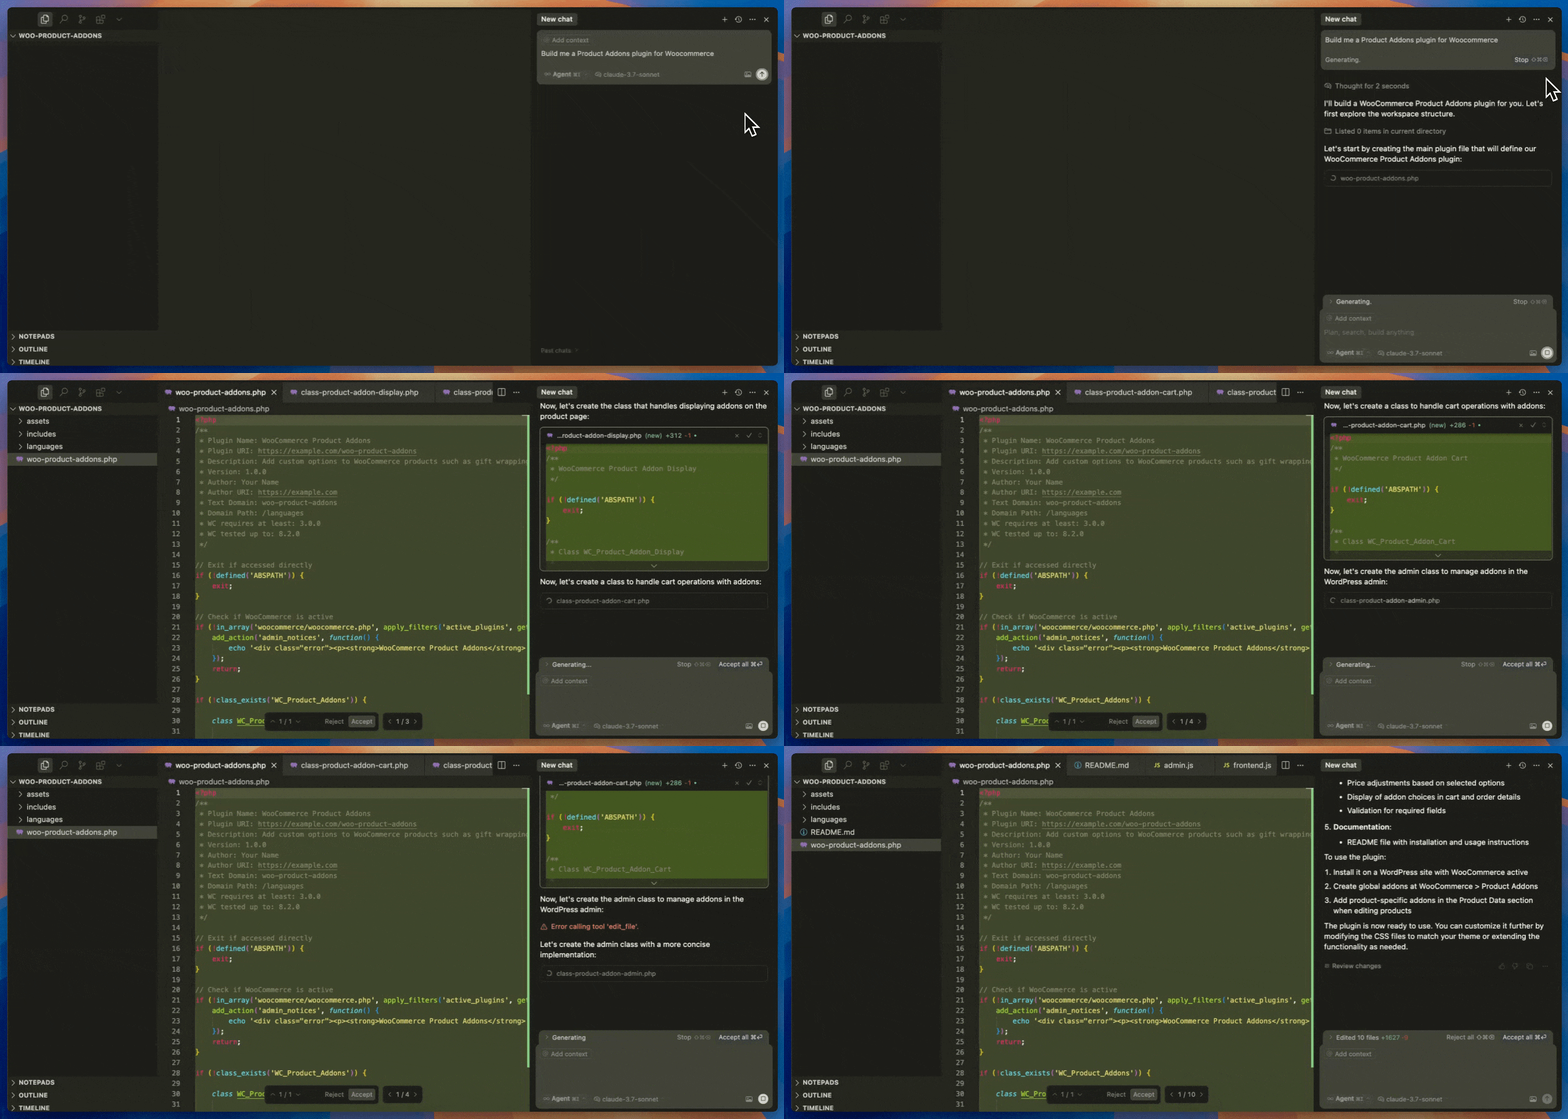
However, the reality is often disappointing:
- The generated code has hidden bugs and edge cases
- Critical WooCommerce hooks are missing
- Security measures are incomplete
- The plugin breaks when tested with real data
We can’t just give one-line prompts and expect AI to build production-ready plugins
So… What’s the Right Way to Use AI for WordPress Plugins?
Instead of relying on one-line prompts, let’s look at how to build plugins properly.
A better approach involves:
- Start by clearly defining what you need
- Break big problems into smaller pieces
- Plan before you code
With a proper workflow, you’re not guessing — you’re engineering a plugin that works.
This mirrors traditional software development:
- Requirements gathering
- Design and planning
- Implementation in stages
- Testing and verification
There’s a reason the pros don’t just wing it, or in a more trending term, “vibe it”
The best software in the world? It’s built on systems — not guesswork. That’s how it scales. That’s how it lasts. It’s why companies invest in process, testing, and repeatability workflows.
Like Tony Robbins says: “Success leaves clues.” If you want to build like the best, follow what the best do.

This is why we need a proper workflow to build plugins with AI. Rather than hoping for an instant solution, we need a systematic approach. Let me show you how.
Here’s How I Actually Use AI to Build Plugins
Disclaimer: I didn’t develop this workflow myself. Credit goes to McKay Wrigley for creating these templates, which I refine it to better suit for WordPress plugin development. If you’re interested in learning his original templates, he covers them in a 4-hour YouTube video.
Ok, let me give you a brief walkthrough of how does the workflow works first before we jump into the details.

First, we brainstorm the plugin requirements, then establish project rules. Based on these, we develop specifications using user stories. Finally, we use all these results to create a step-by-step implementation plan for building the plugin.
With our implementation plan ready, we execute each step one at a time.
This workflow closely mirrors traditional manual development. The main difference is that AI handles the heavy lifting instead of us doing it ourselves.
Let’s dive into the details of each step:
Step 1: Brainstorm for plugin requirements
This is the MOST important step of all.
Many people have trouble building WordPress plugins with AI because they just write one line and hope AI figures out what to include. This usually gives them incomplete plugins or the wrong thing entirely.
When working with AI, you need to be very clear about what you want.
That’s why we start with brainstorming—it helps us know exactly what to build.
You might be thinking, “But Nathan, I don’t know how to write plugin requirements!”
Don’t worry—we’ll use AI, specifically Claude 3.7 Sonnet, to help us brainstorm the requirements.
Here’s the prompt I use for brainstorming plugin requirements:
I have a WordPress plugin idea I'd like to develop. Here's my initial concept:

---

{{_IDEA_}}

---

I'm looking to collaborate with you to turn this into a detailed plugin request. Let's iterate together until we have a complete request that I find to be complete.

After each of our exchanges, please return the current state of the request in this format:

```request
# Plugin Name
## Plugin Description
[Description]

## Target Audience
[Target users]

## Desired Features
### [Feature Category]
- [ ] [Requirement]
    - [ ] [Sub-requirement]

## Design Requests
- [ ] [Design requirement]
    - [ ] [Design detail]

## Other Notes
- [Additional considerations]
```

Please:
1. Ask me questions about any areas that need more detail
2. Suggest features or considerations I might have missed
3. Help me organize requirements logically
4. Show me the current state of the spec after each exchange
5. Flag any potential technical challenges or important decisions

We'll continue iterating and refining the request until I indicate it's complete and ready.
(Replace {{IDEA}} with your actual plugin idea.)
Your idea can be a one-liner or a full list of features you want to include in the plugin.
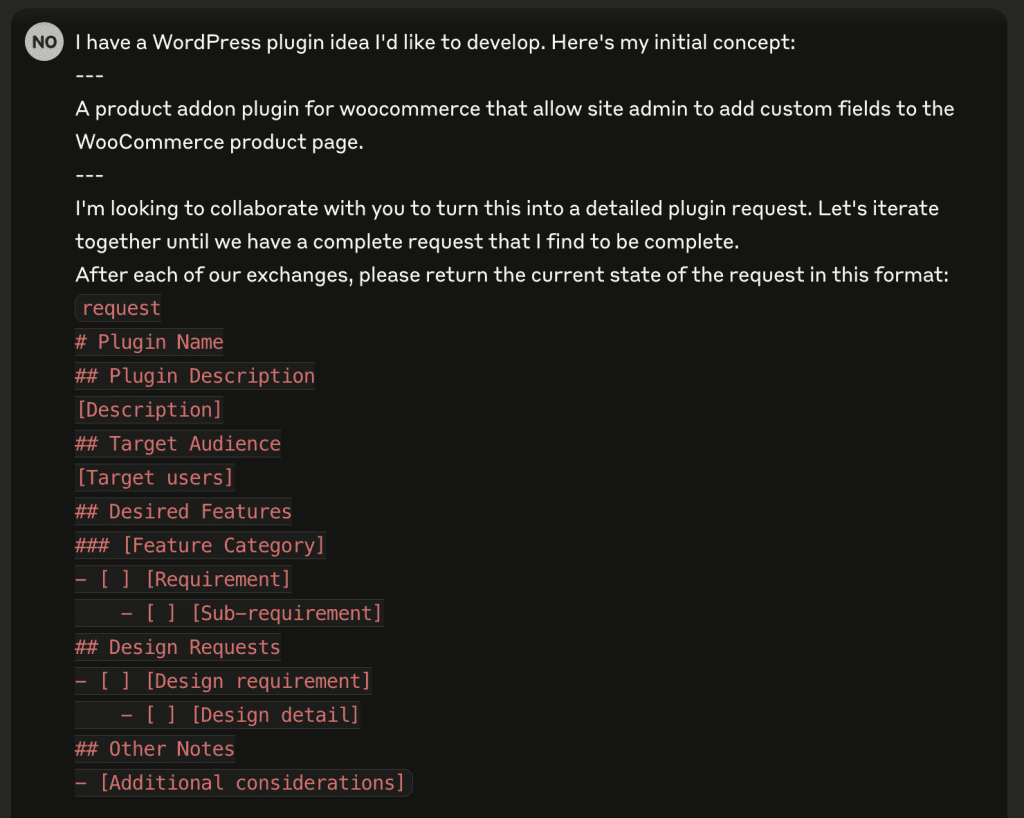
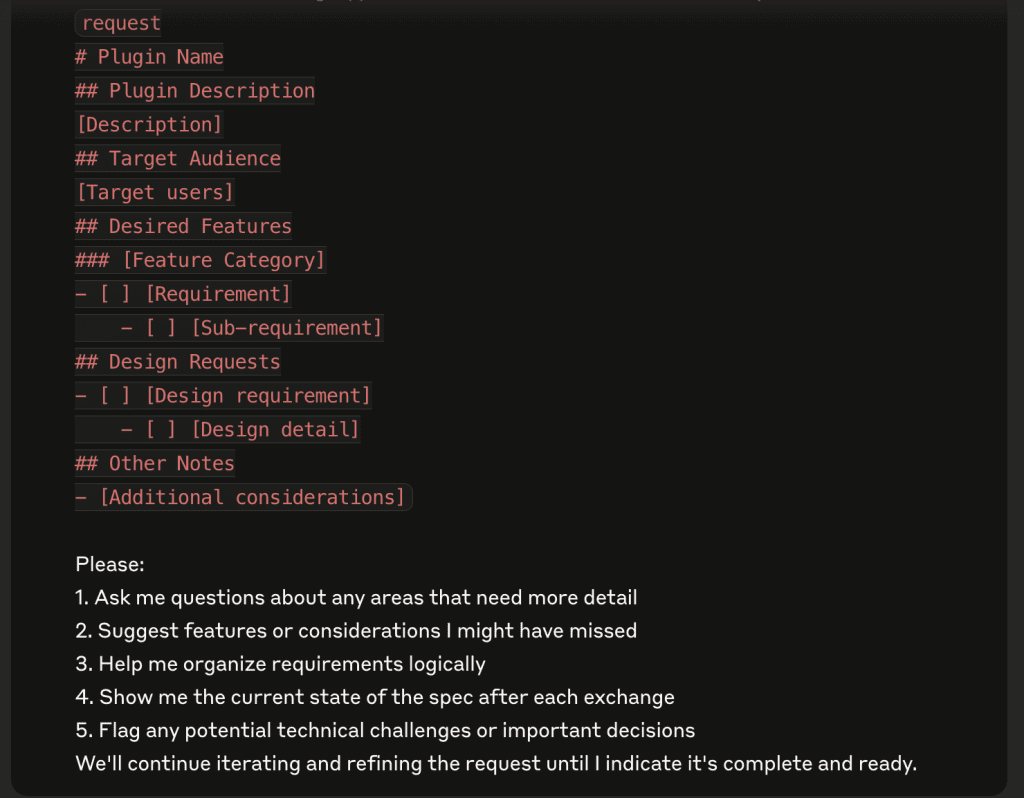
The goal is to give Claude something to work with as a starting point.
During the brainstorming process, Claude will ask questions to clarify what you want.


We’ll go through several iterations until we’re satisfied with the requirements.


IMPORTANT: While Claude 3.7 can be very detailed (which is great for brainstorming), be careful not to simply agree with everything it suggests. Saying “yes” to everything will make your requirements too complicated, causing problems later during development.
Take time to think through what you should and shouldn’t include.
If you’re just starting out, you might not know which features to choose—and that’s perfectly fine. You’ll develop better judgment with experience, so don’t worry too much now.


Once we’re satisfied with the requirements, we can move on to the next step.
Step 2: Establish Project Rules
Project rules tell AI exactly how to build your plugin.
We’ll specify things like naming style, folder layout, and which WordPress or WooCommerce hooks to use. This helps prevent mistakes before they happen.

Think of these rules like guardrails. When we say things like “no Composer autoloaders” or “only WooCommerce 9.x functions,” AI stays focused on exactly what we need.
While you can find project rules online from other developers, I prefer using OpenAI deep research to create my own rules.
Here’s the prompt I use to ask OpenAI deep research to research for project rules for WordPress plugin:
Help me write a comprehensive, detailed project rules that I can used for Cursor AI. This project rules is building a WordPress plugin.

This project rules should follow the native WordPress plugin development coding standard, and sticking to core WordPress methodologies. This native approach avoids modern PHP features like Composer-based autoloading, namespaces, MVC approach, or advanced package management.

Here are some details about Cursor Project rules:

```
Rules for AI
Guide to customizing AI behavior in Cursor using project-specific and global rules for model responses

Using rules in Cursor you can control the behavior of the underlying model. You can think of it as instructions and/or a system prompt for LLMs.

Inside Cursor, we have two main ways to customize the behavior of the AI to suit your needs:

Project Rules
Rules specific to a project, stored in the .cursor/rules directory. They are automatically included when matching files are referenced.

Global Rules
Rules applied globally to all projects, configured in the Cursor Settings > General > Rules for AI section.

Learn more about how to use them in the following sections.

Project Rules (recommended)

Project rules offer a powerful and flexible system with path specific configurations. Project rules are stored in the .cursor/rules directory and provide granular control over AI behavior in different parts of your project.

Here’s how they work

- Semantic Descriptions: Each rule can include a description of when it should be applied
- File Pattern Matching: Use glob patterns to specify which files/folders the rule applies to
- Automatic Attachment: Rules can be automatically included when matching files are referenced
- Reference files: Use @file in your project rules to include them as context when the rule is applied.

Example use cases:

- Framework-specific rules for certain file types (e.g., SolidJS preferences for .tsx files)
- Special handling for auto-generated files (e.g., .proto files)
- Custom UI development patterns
- Code style and architecture preferences for specific folders

```

You can refer to this directory for examples of cursor project rules: [https://cursor.directory/rules](https://cursor.directory/rules)

OpenAI Deep Reaearch can analyze various online resources – documentation, repositories, and discussions – to gather comprehensive information about WordPress plugin development best practices. It can identify common patterns in coding standards, security measures, and architectural approaches used by successful plugins.
This helps create a set of project rules that incorporate proven community standards while remaining focused on your specific plugin needs. The result is a practical, well-vetted foundation for your development work.
Here are the project rules I generated from the prompt above:
# Global WordPress Standards and Best Practices (`wordpress-general.mdc`)

```
---
description: Enforce WordPress coding standards and best practices for all plugin files
globs:
  - "**/*"
alwaysApply: true
---

## Recommended project structure
```
my-plugin/
├─ my-plugin.php            ← Main plugin bootstrap (contains header)
├─ readme.txt               ← WordPress.org–style read‑me (optional)
├─ uninstall.php            ← Clean‑up on uninstall (optional)
├─ admin/                   ← Dashboard‑only code (menus, settings pages, notices)
├─ frontend/                ← Public‑facing features (shortcodes, blocks, templates)
├─ includes/                ← Core logic, helpers, custom post‑type/classes
├─ assets/
│  ├─ css/                  ← Stylesheets loaded via wp_enqueue_style
│  ├─ js/                   ← Scripts loaded via wp_enqueue_script
│  └─ images/               ← Icons or other media
└─ languages/               ← .pot / .po / .mo translation files
```

> **Why this layout?**
> • Keeps admin, frontend, and shared logic isolated, mirroring WordPress’s own separation.
> • Simplifies conditional loading (e.g., enqueue assets only where needed).
> • Helps maintain predictable paths for Cursor’s glob rules (`admin/**`, `frontend/**`, etc.).

---

- **Follow official WordPress Coding Standards** for PHP, JS, HTML, and CSS (tabs for indentation, brace style, no trailing whitespace, descriptive names).
- **Avoid modern PHP features** (Composer autoloaders, namespaces, traits, MVC frameworks). Use procedural functions or classic classes with a unique prefix.
- **Never modify WordPress core files.** Hook into WordPress via `add_action`/`add_filter`. Execute plugin logic only through hooks or on activation / deactivation.
- **Use core APIs** (Settings API, REST API, WP Cron, `$wpdb` with prepared statements, `wp_remote_get`, etc.) instead of reinventing functionality.
- **Internationalize everything.** Wrap user‑facing strings in `__()`, `_e()`, `_n()`, etc., with a single text domain that matches the plugin slug.
- **Escape output & sanitize input** (`esc_html()`, `esc_attr()`, `sanitize_text_field()`, etc.) to prevent XSS and SQLi.
- **Prefix every global** (functions, classes, constants, option keys) with a unique plugin slug (e.g. `myplugin_`).
- **Standard plugin header** and `ABSPATH` check in every PHP entry file (e.g. `if ( ! defined( 'ABSPATH' ) ) exit;`).
- **Keep code modular**; include files from `includes/` as needed with `require_once`, but avoid side‑effects inside those include files.
- **Test with `WP_DEBUG` on**, resolve notices/warnings, and document complex functions with PHPDoc.
```

# Admin Area Code (`wordpress-admin.mdc`)

```
---
description: Guidelines for WordPress plugin admin (dashboard) code and functionality
globs:
  - "admin/**"
---

- Admin code should run **only in the WordPress admin context**. Use `is_admin()` or admin-specific hooks to ensure code only executes in the dashboard (e.g. hook into `admin_menu` to add admin pages, `admin_init` for initialization).
- Use the **Settings API** for admin settings pages (e.g. `register_setting()`, `add_settings_section()`, `add_settings_field()`) instead of creating custom form handlers from scratch. This ensures settings are handled consistently by WordPress.
- When adding admin menu items or pages, use `add_menu_page()`/`add_submenu_page()` and related functions. Follow WordPress UI patterns and leverage core styles (use built-in CSS classes) for a native look and feel.
- **Validate user capabilities and intents**: wrap admin functionality with permission checks like `current_user_can()` and use nonces for actions. For example, use `wp_nonce_field()` in forms and `check_admin_referer()` to verify requests, preventing CSRF.
- If your plugin outputs lists or tables in WP Admin, consider using `WP_List_Table` for a consistent, accessible listing interface.
- Enqueue admin-only scripts/styles with the proper hook (`admin_enqueue_scripts`). Do not load plugin assets on every admin page unnecessarily; target your plugin’s pages or specific screens (check `get_current_screen()` if needed).
- Keep the admin code organized: separate display logic from processing logic. For complex HTML forms or layouts, consider moving HTML into include templates and output them via functions, while keeping business logic in PHP.
- Ensure any admin notices, messages, or outputs are translatable and escape all output (use `esc_html__()` for admin text, etc.). Follow the WordPress admin color schemes and icon guidelines if adding custom icons.

```

# Frontend/Public-Facing Code (`wordpress-frontend.mdc`)

```
---
description: Guidelines for WordPress plugin public-facing (frontend) functionality
globs:
  - "frontend/**"
---

- Frontend code should integrate smoothly with the theme and site. Use WordPress **template tags and hooks** rather than direct HTML when possible (e.g. filter `the_content` or use `shortcode` outputs to inject plugin content).
- Provide features via **shortcodes or other pluggable methods** for users to embed plugin functionality. For example, use `add_shortcode()` to register shortcodes that render your plugin’s output. Document their usage for end-users.
- Enqueue all public scripts and styles in the appropriate hook (`wp_enqueue_scripts`). Do not print raw `<script>` or `<link>` tags in HTML; use `wp_enqueue_script()`/`wp_enqueue_style()` with proper dependencies and in-footer loading as needed.
- Ensure output is safe and escapable: never output user data without escaping. Use `esc_html()`, `esc_attr()`, etc. when printing to the frontend. For URLs, use `esc_url()` and for HTML fragments use `wp_kses_post()` if needed.
- Keep frontend performance in mind: only query necessary data (use WP_Query efficiently with caching if appropriate) and avoid heavy computations in templates. Leverage WordPress caching APIs (transients, object cache) when storing expensive results.
- Make your plugin’s frontend output **responsive and accessible**. Use semantic HTML and include ARIA labels or roles if needed. Follow WordPress Theme Review guidelines for front-end output (e.g. no hard-coded inline styles that can't be overridden).
- Avoid conflicts with themes and other plugins: use unique CSS selectors or a specific namespace for your plugin’s CSS, and avoid globally enqueuing scripts that could clash (wrap your JS in a closure or use WordPress’s no-conflict handling for jQuery).

```

# Core Plugin Logic and Includes (`wordpress-includes.mdc`)

```
---
description: Guidelines for shared core logic and helper includes in the plugin
globs:
  - "includes/**"
---

- Use the `includes/` directory for shared classes, utilities, and core functions of your plugin. These files contain the business logic and should be loaded by the main plugin file as needed (e.g. via `require_once`).
- **Do not execute code in include files at load time** (other than function and class definitions). Any functional code (like hooking into actions) should be called from the main plugin file or an initialization function, not run automatically when the file is included.
- Structure your code into reusable functions or classes. It’s fine to define classes in includes (for example, a class handling a custom post type), but avoid namespaces – instead, prefix class names (e.g. `My_Plugin_Helper`) to prevent collisions.
- Leverage WordPress core APIs within your logic: for database interactions use the `$wpdb` object or WP functions, for custom post types use `register_post_type()`, for scheduling use WP Cron (wp_schedule_event), etc., rather than custom implementations.
- If your plugin defines custom REST API endpoints, register them via `register_rest_route()` in an initialization hook (e.g. `rest_api_init`), and keep the callback implementations in this includes folder. Similarly, if defining a widget, extend `WP_Widget` in includes and register it on the `widgets_init` hook.
- Keep functions focused and documented. Follow WordPress PHP coding style in these files (including Yoda conditions, spacing, etc.). Provide PHPDoc comments for complex functions or classes to describe their purpose.
- The includes should be logically organized (you can create sub-folders if necessary, e.g. `includes/api/`, `includes/helpers/`). Each file should generally encapsulate a specific piece of functionality (one class or a set of related functions).

```

# Assets (JavaScript, CSS, Images) (`wordpress-assets.mdc`)

```
---
description: Guidelines for static assets (JS, CSS, images) used by the plugin
globs:
  - "assets/**"
---

- Organize front-end assets in this directory (e.g. put CSS, JS, images in subfolders like `assets/css/`, `assets/js/`, etc.). Use WordPress functions to load them rather than hard-coding paths.
- **JavaScript**: Follow WordPress JavaScript Coding Standards. For example, use single quotes for strings, indent with tabs, and name variables descriptively. Avoid polluting global namespace; wrap your code in an IIFE or module pattern. If using jQuery, use it in no-conflict mode (WordPress includes jQuery by default) — e.g. wrap your script with `(function($){ ... })(jQuery);`.
- **CSS**: Adhere to WordPress CSS Coding Standards (proper commenting, one rule per line, etc.). Use class names that are unlikely to conflict (perhaps prefix with your plugin or unique identifier). Avoid !important if possible to let themes override styles if needed.
- Enqueue asset files through PHP: e.g. call `wp_enqueue_script()` for your `assets/js` files and `wp_enqueue_style()` for `assets/css` files, usually in the plugin’s init or specific hook. Specify dependencies (like jQuery) and version numbers (possibly use plugin version) for cache busting.
- If your build process generates minified files, load those in production (and handle dev vs prod if applicable). However, a simple plugin can be written with plain JS/CSS without a complex build pipeline, to align with WordPress’s preference for simplicity.
- Load assets conditionally: only on pages where needed. For example, if your script is only used on a shortcode or a particular page, use `wp_enqueue_script` inside that shortcode handler or on specific conditionals, so it doesn’t load site-wide unnecessarily.
- Ensure any images or media in assets are properly referenced and used. For example, if you have icons or images, use functions like `plugins_url()` or `plugin_dir_url(__FILE__)` to get the correct path to assets in your code.

```

# Internationalization and Localization (`wordpress-i18n.mdc`)

```
---
description: Ensure all user-facing text is internationalized (translatable) and localized properly
globs:
  - "languages/**"
---

- All user-facing strings in the plugin **must be wrapped in translation functions**. Use `__()` for returning translated text, `_e()` for echoing text, `_n()` for plural forms, and `_x()` or `_ex()` when context is needed. Example: `__('Hello World', 'your-plugin-textdomain')`.
- Maintain a consistent **text domain** for your plugin. The text domain should match the plugin’s slug (and the one declared in the plugin header). Every translation function call should include this exact text domain string.
- Include a `languages/` folder with a `.pot` file (translation template). Update the `.pot` file whenever strings change, so translators can create `.po` and `.mo` files for their language. In the plugin header, declare `Domain Path: /languages` so WordPress knows where to find translations.
- **Load the text domain** on plugin initialization. Call `load_plugin_textdomain( 'your-plugin-textdomain', false, dirname( plugin_basename(__FILE__) ) . '/languages' );` in an early hook (e.g. `plugins_loaded`) to make sure translations are available.
- Avoid string concatenation that would make translation difficult. Instead, use placeholders and `sprintf()` or `number_format_i18n()` for variables within translatable strings. E.g., `sprintf( __('Hello %s', 'your-plugin-textdomain'), $username )`.
- Provide translator comments where needed for clarity. For example, above a complex string you can add `// translators: %s is the username` to help translators understand context.
- Ensure locale-specific formatting is considered. Use date and time functions that respect WordPress locale (like `date_i18n()` for dates) and number formatting functions for numbers/prices in output.

```

Each of these rule files should be placed in the `.cursor/rules` directory of your WordPress plugin project. With these rules in place, the Cursor AI assistant will consistently follow WordPress’s native development practices, adhere to coding standards, utilize core APIs correctly, and handle internationalization properly across your plugin. This helps maintain a high-quality codebase that is in line with WordPress community best practices.
Step 3: Generate Technical Specifications based on User Stories
Next, we’ll create technical specifications using user stories, incorporating both our requirements and project rules.
User stories keep our specifications tied to real-world needs.

For example, consider this WooCommerce Product Add-ons user story: “As a shop owner, I want to let customers add gift wrapping so I can earn more per sale.”
This simple format tells AI exactly who needs the feature, what to build, and why it matters. It creates a clear checklist that prevents AI from adding unnecessary features.
This is the prompt I used to generate technical specs:
You are an expert software architect tasked with creating detailed technical specifications for software development projects.

Your specifications will be used as direct input for planning & code generation AI systems, so they must be precise, structured, and comprehensive.

First, carefully review the plugin requirements:

<plugin_requirements>
{{_REQUIREMENTS_}}
</plugin_requirements>

Next, carefully review the WordPress plugin guidelines:

<wp_plugin_guidelines>
{{_RULES_}}
</wp_plugin_guidelines>

Your task is to generate a comprehensive technical specification for a WordPress plugin based on all the above information.

Before creating the final specification, analyze the project requirements and plan your approach. Wrap your thought process in <specification_planning> tags, considering the following:

1. **Core Plugin Architecture & Key Workflows**
   - Overview of what the plugin does and how it integrates with WordPress.
   - Any custom post types, taxonomies, or database interactions.
   - Activation/deactivation/uninstall flows.

2. **Plugin Folder Structure & Organization**
   - How files and directories will be arranged (admin, public, includes, etc.).
   - References to the main plugin file, admin partials, public-facing templates, etc.

3. **Detailed Feature Specifications**
   - Each key feature should have user stories, implementation steps, hooks used, and any relevant admin/public UI components.

4. **Database Schema (if applicable)**
   - Description of custom tables (if needed).
   - MySQL vs. SQLite compatibility strategies (if applicable).
   - Data validation and sanitization.

5. **WordPress Actions, Filters & Hook Implementations**
   - Which hooks (actions/filters) are used or created by the plugin.
   - Purpose and flow for each.

6. **Admin Settings & UI**
   - Usage of the WordPress Settings API.
   - Menu page structure.
   - Enqueueing admin assets.

7. **Public-Facing UI (if applicable)**
   - Templates or shortcodes.
   - Enqueueing CSS/JS for the front-end.
   - Any public endpoints or custom routes.

8. **Security & Capability Checks**
   - Nonce usage.
   - Sanitization and escaping.
   - Role/capability checks for admin actions.

9. **Internationalization & Localization**
   - How text domains and translation files are set up.

In your analysis, be sure to:
- Break down complex features into step-by-step flows.
- Identify areas that require further clarification or have potential risks.
- Propose solutions or alternatives for any identified challenges.

After your analysis, generate the technical specification in **Markdown** using the structure below. Make sure the details align with WordPress plugin best practices:

```markdown
# "{Project Name}" WordPress Plugin Technical Specification

## 1. System Overview
- Core purpose and value proposition
- Key workflows
- High-level plugin architecture

## 2. Plugin Folder Structure
- Directory layout (admin, includes, public, etc.)
- Key files and their responsibilities

## 3. Feature Specification
For each feature:
### 3.1 Feature Name
- User story and requirements
- Implementation steps (hooks, functions, UI changes)
- Error handling and edge cases

## 4. Database Schema (if applicable)
### 4.1 Tables
For each table:
- Complete table schema (field names, types, constraints)
- Relationships and indexes
- MySQL/SQLite compatibility considerations (if relevant)

## 5. WordPress Hooks & Actions
### 5.1 Custom Actions / Filters
- Detailed description of each custom action/filter
- Input parameters and return values
- Usage examples

### 5.2 Core WordPress Hooks Utilized
- Explanation of how and why these hooks are being used
- Examples of callback functions

## 6. Admin Settings & UI
- Settings page structure (menu, sub-menu)
- WordPress Settings API usage
- Enqueueing admin assets (CSS/JS)
- Access control (capabilities)

## 7. Public-Facing Functionality
- Shortcodes, template tags, or public-facing pages
- Enqueueing front-end assets (CSS/JS)

## 8. Security & Capability Checks
- Nonce usage
- Sanitization and escaping patterns
- Role/capability verification

## 9. Internationalization
- Text domain configuration
- .po/.mo file placement
- Steps to generate translation files

```

Ensure that your specification is **extremely detailed**, providing specific implementation guidance wherever possible. Include concrete code snippets for complex features and clearly define any interfaces between components (e.g., how data flows between admin forms and the database).

Begin your response with your <specification_planning> analysis, then proceed with the complete Markdown technical specification. Once you are done, this document will be passed to the AI code planning system for implementation.
(Replace the placeholder for requirements and project rules with the actual requirements and project rules)
Note: While I prefer using O1 Pro for generating technical specifications due to its superior results, Gemini 2.5 Pro is also a viable alternative.
Here’s the result:


Step 4: Generate implementation plan
The implementation plan breaks down the development process into clear, manageable steps that AI can understand and execute.
This serves as a roadmap that guides the AI through the development process.
Here’s the prompt I use to generate implementation plans:
You are an AI task planner responsible for breaking down a complex WordPress plugin development project into manageable steps.

Your goal is to create a detailed, step-by-step plan that will guide the code generation process for building a fully functional WordPress plugin based on a provided technical specification.

First, carefully review the following inputs:

<plugin_requirements>
{{_REQUIREMENTS_}}
</plugin_requirements>

<wp_plugin_guidelines>
{{_RULES_}}
</wp_plugin_guidelines>

<technical_specification>
{{_SPECS_}}
</technical_specification>

After reviewing these inputs, your task is to create a comprehensive, detailed plan for implementing the WordPress plugin.

Before creating the final plan, analyze the inputs and plan your approach. Wrap your thought process in <brainstorming> tags.

Break down the development process into small, manageable steps that can be executed sequentially by a code generation AI.

Each step should focus on a specific aspect of the plugin and should be concrete enough for the AI to implement in a single iteration. You are free to mix both admin and public tasks if they make sense together.

When creating your plan, follow these guidelines:

1. **Start with the plugin folder structure** and essential WordPress configurations (plugin header, main plugin file).
2. **Progress through database schema** setup if needed (custom tables), along with the hooks or functions to manage plugin activation, deactivation, and uninstall.
3. **Move on to shared functionalities** in the `includes` directory, such as helper functions or hooks implementations.
4. **Break down the implementation of admin pages** (settings screens, custom post types, etc.) and any public-facing features into smaller, focused steps.
5. **Include steps for integrating** custom capabilities, roles, security checks (nonces, sanitization, escaping), and any other WordPress APIs.
6. **Incorporate steps for enqueuing assets** (CSS/JS) in both admin and public contexts.
7. Ensure that **each step** is atomic and self-contained enough to be implemented in a single code generation iteration. Each step should modify **no more than 20 files** at once (ideally fewer) to keep changes manageable. Be sure to include instructions for any manual tasks the user must perform (e.8., running SQL scripts, updating environment variables, etc.).

Present your plan using the following markdown-based format. This format is designed to integrate with the subsequent code generation phase, where an AI will systematically implement each step and mark it as complete. **Each step must be atomic** and self-contained:

```md
# Implementation Plan

## [Section Name]
- [ ] Step 1: [Brief title]
  - **Task**: [Detailed explanation of what needs to be implemented]
  - **Files**: [Maximum of 20 files, ideally less]
    - `path/to/file1.php`: [Description of changes]
  - **Step Dependencies**: [List any previous step(s) that must be completed before this step]
  - **User Instructions**: [Any manual instructions for the user, if applicable]

[Additional steps...]
```

After presenting your plan, provide a **brief summary** of the overall approach and any key considerations for the implementation process, such as security, localization, or potential risks.

Remember to:
- Ensure that your plan covers all aspects of the **WordPress plugin** technical specification.
- Break down complex features (e.g., custom admin pages, database interactions) into smaller, manageable tasks.
- Consider the **logical order** of implementation, ensuring that hooks, data structures, and dependencies are addressed in the correct sequence.
- Include steps for **error handling, data validation, and edge case** management.
- Reference **WordPress best practices** for hooks (actions/filters), capability checks, i18n, enqueuing scripts/styles, and so on.

Begin your response with your <brainstorming> analysis, then proceed to create your detailed implementation plan for the WordPress plugin based on the provided specification.

Once you are done, we will pass this specification to the AI code generation system.
(Replace the placeholders with the actual requirements, project rules and specifications you generated in the previous steps)
Note: I prefer using O1 Pro for generating implementation plans since it produces clearer, more streamlined plans compared to other models. However, if you want to avoid O1 Pro’s higher pricing, Gemini 2.5 Pro is a solid alternative.
Here’s the result:
Step 5: execute the implementation plan, step-by-step using Cursor AI
Now that we have everything ready, it’s time to build the plugin with Cursor AI.
First, set up a local WordPress development environment on your computer. I’m using LocalWP since it’s most familiar to the WordPress community.

Next, navigate to the WordPress wp-content/plugins folder and create a new folder for your plugin.

Create a notes folder inside the plugin folder and add your plugin requirements, specifications, and implementation plan to it.
Set up a .cursor/rules folder for your project rules and move all rules into that folder.
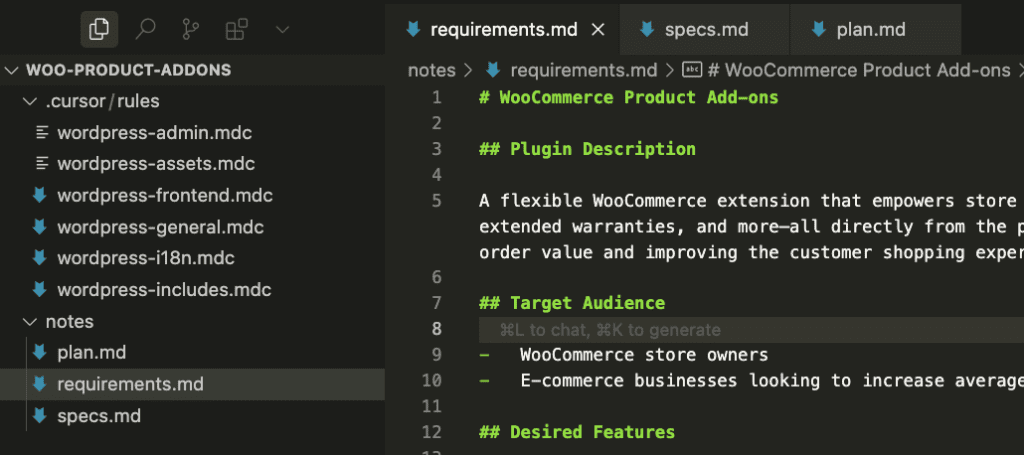
Once everything is set up, follow the instructions outlined in the video below:
Here’s the prompt used in the video:
Your task is to systematically implement each step of the plan, one at a time.

First, carefully review the following inputs:

{{_INPUTS_}}

Then, implement the following steps:

{{_STEP_}}

The implementation plan is a high-level guide. Use it to shape your approach, but you do not have to follow it strictly. However, you must adhere to the specified **WordPress plugin** rules, guidelines, and technical requirements.

### Documentation Requirements

-   **File-level documentation**: Purpose and scope of each file
-   **Function-level documentation**: Inputs, outputs, and logic flow
-   **Inline comments**: For complex logic or essential WordPress considerations (e.g., nonce checks, hooks usage)
-   **Edge cases and error handling**: Address potential pitfalls and how you are handling them
-   **Notes**: Any assumptions or limitations

### Guidelines

1. **Implement exactly one step** at a time from the plan.
2. Ensure all code follows **WordPress plugin best practices** and the provided technical specification.
3. Include **all necessary imports** (e.g., `require_once` or WordPress function calls).
4. Write clean, well-documented PHP code with appropriate **WordPress coding standards** (4 spaces indentation, prefixed function names, etc.).
5. **Always provide the entire file contents**—avoid ellipses or placeholders.
6. Handle edge cases: Nonce checks, validation, and escaping where appropriate (e.g., `sanitize_text_field()`, `esc_html()`).
7. **Follow the security guidelines**: capabilities checks, nonces, sanitization, prepared statements when interacting with the database.
8. Include or update **tests** (PHPUnit, if specified in the plan) or demonstration code for your plugin as needed.
9. Use **prefixed** function names and constants (e.g., `my_plugin_`) to avoid naming collisions.
10. **Type Declarations**: If employing any advanced static analysis or using typed PHP, ensure correctness. Otherwise, ensure thorough docblocks for clarity.
11. **Begin by identifying** the next incomplete step from the plan, then generate the required code.
12. Above each file’s XML entry, provide a summary titled: "**Here's what I did and why**".
13. End your overall response with:
    - "**STEP X COMPLETE. Here's what I did and why:**" – Summarize your changes
    - "**USER INSTRUCTIONS**: Please do the following:" – Provide instructions for any manual tasks needed (e.g., activating the plugin, updating WordPress settings, running SQL queries in the database, etc.).
14. If you **update the implementation plan**, append the updated steps as Markdown code blocks after the user instructions.

This structure ensures your code is clearly delineated, documented, and ready to be tested or merged into the ongoing **WordPress plugin** development process
Let’s Talk About the Hard Part

.
.
.
Challenge #1: No Single AI Tool Can Do It All
This workflow requires different AI tools to achieve the best results, as there’s no single AI model that can handle everything perfectly from start to finish.
Each AI model has its specialized strengths and optimal use cases:
- Claude excels at thoughtful analysis, brainstorming, and detailed requirements gathering
- OpenAI’s deep research capabilities are perfect for compiling project rules and technical specifications
- Gemini and o1 Pro are particularly good at generating implementation plans and technical documentation
- Cursor AI stands out for code implementation, offering real-time suggestions and debugging assistance
In our demo, you saw how we leveraged these different tools:
- We started with Claude 3.7’s thinking mode for thorough plugin requirement analysis
- Then used OpenAI’s deep research capabilities to develop comprehensive project rules
- Followed by O1 Pro and Gemini 2.5 Pro for generating detailed technical specifications and implementation plans
- Finally, we used Cursor for the actual coding and implementation phase

We are using each tool for what it best at.
So, this multi-tool approach gives us significantly better results than trying to rely on a single AI model.
However, this also means that it would leads us to the next challenge, which is….
Challenge #2: These AI Tools Aren’t Free
Every AI tool out there, whether it’s fancy IDEs like Cursor and Windsurf, or chat assistants like ChatGPT, Gemini, and Claude – none of them are completely free.
Sure, they all have free versions, but here’s the catch – you either get basic models that can’t handle complex tasks, or limited access to the good stuff. And trust me, when you’re building a WordPress plugin from scratch, you need the good stuff.

These tools typically cost between $20 – 200 USD monthly
ChatGPT Pro? That’s the premium option at $200 USD per month
Now, I can already hear you saying, “Nathan, $200 per month? That’s a lot of money!”
But let me share something interesting with you
Not too long ago, a friend came to me needing a custom plugin to connect a popular Malaysian payment gateway with their premium plugin
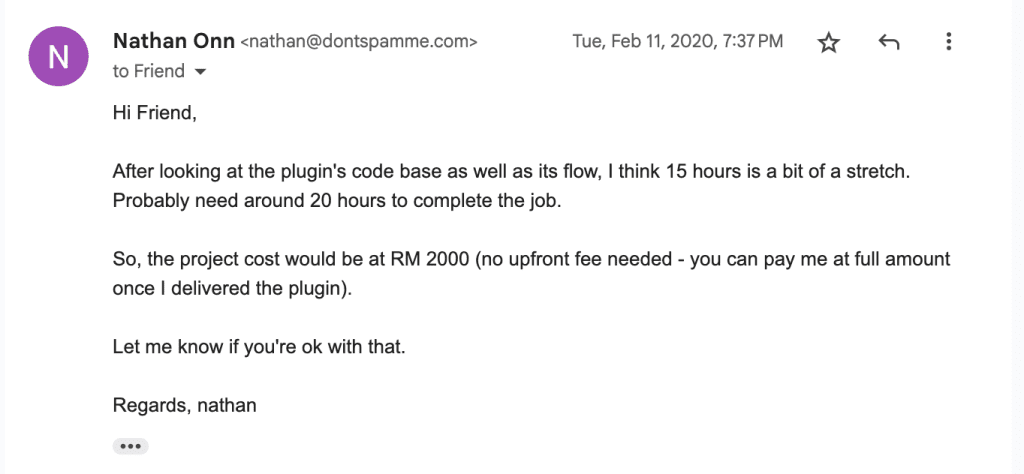
Back then, I told him it would take 20 hours at RM100 per hour – adding up to RM2,000
Now, with our AI workflow? I could wrap up the same project in just an hour or two
Here’s what I want you to understand – it’s not about how much these tools cost, it’s about what they help you earn.
Think about it – if spending RM1,000 helps you earn RM2,000, while saving tons of time… that’s actually pretty amazing, right?

.
.
.
What You Should Really Take Away From This

1. AI is not a magic wand… yet.
Therefore, we can’t just wave it around and expect perfect results.
Just like humans need to follow specific steps to achieve their goals, AI requires the same systematic approach.
2. This workflow is a “Work in Progress” — and That’s Okay
Since AI is still developing, our current workflow isn’t perfect. However, as AI continues to improve and better understands our needs, this workflow will become more and more effective.

3. It’s Not About the Cost — It’s About the Return
As I mentioned earlier, while some AI tools can be expensive (like O1 Pro, which requires a ChatGPT Pro subscription at $200 USD per month), we shouldn’t focus solely on the price tag.

Instead, consider the value these tools deliver. Take my earlier example — if you can invest $1K in AI tools to earn $2K from your projects, that’s a fantastic return because your costs are more than covered by what you’re able to deliver.
4. AI Can Build With You — But You Still Need to Think Like a Developer
Use these AI tools as a stepping stone to learn WordPress plugin development.
In the past, you will have to to learn PHP first—including concepts like variables, arrays, functions, and algorithms—before you could build a plugin.

Now, with AI, you can start building plugins right away and learn these programming concepts as you go, helping you better understand the AI-generated code.
Programming remains an incredibly valuable skill. It’s not just about writing code—it’s about systems thinking and architecture.
“Vibe coding” will only work when you truly understand what you’re doing.

That’s why I encourage you to develop your programming skills along the way.
Think about it – every line of code you write, whether through AI or not, is a building block in your journey as a developer.
The tools may change, but the fundamentals of problem-solving and creative thinking remain constant.
As you navigate this evolving landscape of AI-assisted development, ask yourself: Are you using AI as a crutch, or as wings to help you soar higher?
The answer might just reshape how you approach not just plugin development, but your entire journey in tech.
Leave a Comment